Are you an avid coffee or tea lover who cannot do without a rich, creamy foam on top of your beverage? If so, then you should learn how to use an immersion blender to froth milk. This versatile kitchen gadget is perfect for creating a frothy, creamy texture to top off your favorite hot or cold beverages. Here’s everything you need to know about using an immersion blender to froth milk.
What is an Immersion Blender and How Does it Work?
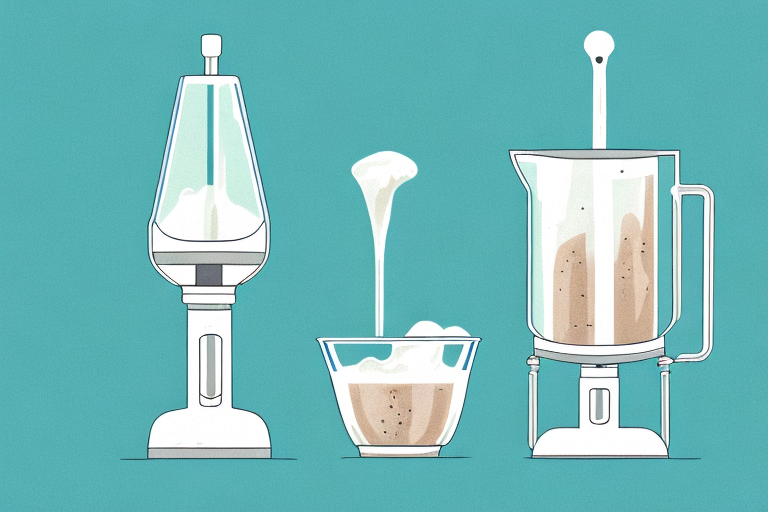
Before we dive into the specifics of using an immersion blender to froth milk, let’s first understand what it is and how it works. An immersion blender, also known as a hand blender or stick blender, is a handheld device that is used to blend, puree or whip up small amounts of food or liquids.
The device consists of a long shaft with blades at the end that rotate at high speeds to create a whirlpool effect, which results in the frothy, creamy texture that we all love. Unlike traditional blenders, immersion blenders can be used directly in the container or cup that you use to froth milk or blend other food items.
One of the advantages of using an immersion blender is that it is much easier to clean than a traditional blender. Since the blades are detachable, you can easily remove them and wash them separately. Additionally, the shaft of the immersion blender can be wiped clean with a damp cloth, making it a convenient option for those who want to save time in the kitchen.
Another benefit of using an immersion blender is that it is much quieter than a traditional blender. This is because the motor is located in the handle of the device, rather than in the base, which reduces the amount of noise that is produced during use. This makes it a great option for those who want to blend or puree food items without disturbing others in the household.
Benefits of Using an Immersion Blender for Milk Frothing
Using an immersion blender to froth milk has several benefits, including:
- Quick and easy frothing process: With an immersion blender, you can froth milk in seconds, making it an ideal gadget for busy mornings.
- Cost-effective: Immersion blenders are relatively cheaper compared to electric milk frothers or steam wand espresso machines, making them an affordable option for home use.
- Versatility: Immersion blenders can be used for frothing milk or blending other food items, making them a versatile kitchen gadget.
Another benefit of using an immersion blender for milk frothing is that it allows you to control the texture and consistency of the frothed milk. Unlike other frothing methods, such as steam wand espresso machines, immersion blenders give you more control over the frothing process, allowing you to create a froth that is as thick or as thin as you like. This is especially useful if you prefer a specific texture of frothed milk for your coffee or other beverages.
Choosing the Right Immersion Blender for Milk Frothing
When selecting an immersion blender for milk frothing, there are several factors to consider, including:
- Power: Look for an immersion blender with a powerful motor to create a thick, creamy froth. A motor with at least 200 watts is recommended.
- Size and weight: Choose a lightweight immersion blender that is easy to handle and fits comfortably in your hand.
- Length of shaft: The shaft’s length determines the depth to which the immersion blender can reach, which is crucial when frothing milk. A longer shaft allows you to reach deeper containers, making it easier to froth milk.
- Accessories: Some immersion blenders come with additional accessories, such as whisk attachments, that make frothing milk easier and more efficient.
Another important factor to consider when choosing an immersion blender for milk frothing is the type of blade it has. Look for an immersion blender with a frothing blade, which is specifically designed to create a thick and creamy froth. This type of blade has a unique shape that creates more air bubbles in the milk, resulting in a better froth. Additionally, make sure the blade is made of high-quality materials that are durable and easy to clean.
Preparing Your Ingredients for Milk Frothing with an Immersion Blender
Before you start frothing milk with your immersion blender, you need to prepare your ingredients first. Here’s what you need:
- Cold milk
- A tall container or cup
To froth milk, it’s best to use cold milk. Fill a tall container or cup with the amount of milk you need for your beverage.
Once you have your cold milk in the container, let it sit for a few minutes to settle. This will help the milk froth better and create a smoother texture. You can also add any flavorings or sweeteners at this point, such as vanilla extract or honey.
When you’re ready to start frothing, place the immersion blender in the milk and turn it on. Move the blender up and down in the milk to create a frothy texture. Be careful not to over-froth the milk, as it can become too thick and lose its smooth texture.
Step-by-Step Guide to Frothing Milk with an Immersion Blender
Now that you’ve got everything ready, here’s a step-by-step guide on how to froth milk with an immersion blender:
- Place the immersion blender in the container of milk, ensuring that the blades are fully submerged in the milk.
- Turn the immersion blender on high speed, and move it up and down to create a whirlpool. Move the blender around the edges of the container to create a smooth and creamy texture.
- Once the milk has doubled in volume and has a frothy consistency, turn off the immersion blender.
Your frothy milk is now ready to be used in your favorite beverage.
It’s important to note that the type of milk you use can affect the frothing process. Whole milk tends to froth the best, while skim milk may not froth as well. Additionally, the temperature of the milk can also impact the frothing process. For best results, use cold milk straight from the fridge and avoid overheating it.
Tips and Tricks for Perfect Milk Froth Every Time
Frothing milk with an immersion blender may seem simple, but there are a few tips and tricks you need to keep in mind to get the perfect froth every time:
- Use cold milk for best results.
- Make sure the container or cup is large enough to accommodate the froth created by the immersion blender. The volume of the milk increases during the frothing process.
- Move the immersion blender up and down in a gentle and consistent motion to create a creamy and consistent froth.
- Avoid foaming milk at high speed, as this creates large bubbles that do not blend well with the milk.
Another important tip to keep in mind is to use the right type of milk. Whole milk is the best option for creating a rich and creamy froth, while skim milk may not froth as well due to its lower fat content. Additionally, if you want to add some flavor to your frothed milk, consider adding a dash of vanilla extract or a sprinkle of cinnamon before frothing.
Common Mistakes to Avoid When Using an Immersion Blender for Milk Frothing
Here are a few common mistakes to avoid when using an immersion blender for milk frothing:
- Using hot milk: If you use hot milk, it may splatter or cause the blades to rust over time.
- Overfilling the container: Do not overfill the container, as the volume of milk doubles during the frothing process, resulting in spillage.
- Using a blender with a low power motor: Blenders with low power motors cannot create the thick and creamy texture needed for frothed milk.
Cleaning and Maintenance of Your Immersion Blender after Milk Frothing
Cleaning and maintaining your immersion blender after frothing milk is crucial to ensure its longevity and optimal performance. Here are a few tips to keep in mind:
- Avoid submerging the motor unit in water. Use a damp cloth to clean the motor unit and the blades.
- Remove any excess milk from the blades and shaft before cleaning.
- Ensure that the immersion blender is completely dry before storing it away.
Delicious Recipes to Try with Your Homemade Milk Foam
Now that you know how to create frothed milk with your immersion blender, here are a few recipes to try:
- Cappuccino: Pour a shot of espresso into a cup and top it off with frothed milk.
- Hot chocolate: Mix hot chocolate powder with frothed milk and enjoy a decadent drink.
- Latte: Mix steamed milk with espresso and top it off with frothed milk.
That’s all you need to know about using an immersion blender to froth milk. With these tips and tricks, you’ll be creating rich, creamy foam to top off your favorite beverages in no time. Enjoy!


