If you’re a fan of baking and cooking, you know that extracts are a staple ingredient in most recipes. These concentrated flavorings are essential in adding depth and character to your dishes. But have you ever considered making your own homemade extracts? Not only is it simple and easy, but it’s also more cost-effective and produces a superior product. In this article, we’ll cover everything you need to know about making your own homemade extracts.
Why Homemade Extracts are Better than Store-Bought
When you make your own extracts, you have complete control over the flavor and quality of the final product. You can choose the ingredients, adjust the concentration, and create unique flavor combinations that you won’t find in stores. Homemade extracts contain no additives, preservatives, or artificial flavors, making them a healthier and more natural alternative. Plus, they can last for years with proper storage, making them a great investment for any kitchen.
Another advantage of making your own extracts is that you can save money in the long run. While the initial cost of purchasing the ingredients and equipment may seem high, the amount of extract you can make from them will last much longer than a store-bought bottle. Additionally, you can reuse the ingredients to make multiple batches of extract, further stretching your investment.
Making your own extracts can also be a fun and creative activity. You can experiment with different flavor combinations and even make personalized extracts as gifts for friends and family. It’s a great way to showcase your culinary skills and impress your loved ones with unique and delicious flavors.
The Benefits of Making Your Own Extracts
Making your own extracts is not only fun and rewarding, but it’s also cost-effective. The price of store-bought extracts can add up quickly, especially if you use them frequently. With homemade extracts, you can save money by buying ingredients in bulk and making larger batches. Plus, you can get creative with your flavor combinations and experiment with different ingredients to create unique and personalized extracts.
In addition to being cost-effective and customizable, making your own extracts also allows you to control the quality of the ingredients. Many store-bought extracts contain additives and preservatives that can affect the taste and quality of your baked goods or other recipes. By making your own extracts, you can ensure that you are using high-quality, natural ingredients without any unwanted additives. This can result in a more pure and flavorful end product.
Essential Tools You Need to Make Homemade Extracts
Thankfully, you don’t need any fancy equipment to make your own extracts. All you need are some basic kitchen tools and ingredients. Here’s what you’ll need:
- Clean glass jars with tight-fitting lids
- Sharp knives or peelers for cutting ingredients
- Measuring cups and spoons
- Cheesecloth or coffee filters for straining
- A funnel for transferring extracts into bottles
Once you have all the necessary tools and ingredients, making your own extracts is a simple process. Start by choosing your flavoring ingredient, such as vanilla beans or citrus peels. Then, chop or grate the ingredient and place it in a clean glass jar. Cover the ingredient with a high-proof alcohol, such as vodka or rum, and let it sit for several weeks to infuse the flavor. Once the flavor has developed, strain the mixture through cheesecloth or a coffee filter and transfer the extract to a bottle using a funnel. Homemade extracts make great gifts and can add a delicious, personalized touch to your baked goods and cocktails.
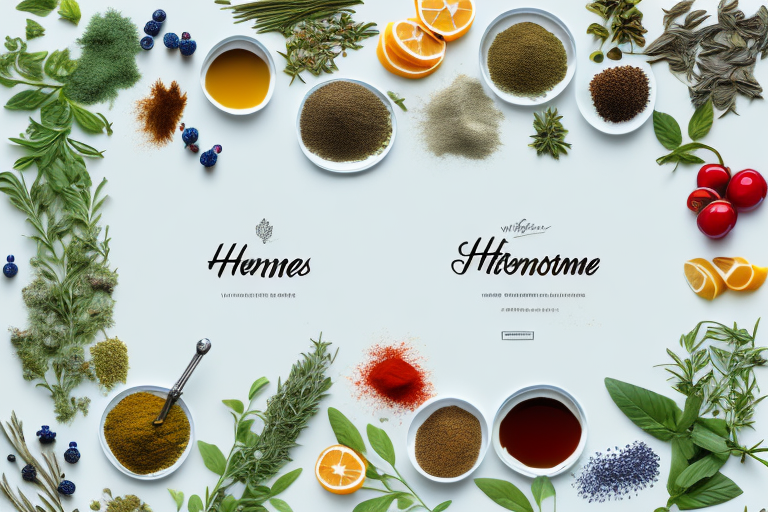
The Best Ingredients for Homemade Extracts
The world of homemade extracts is vast and varied, but some ingredients work better than others. Here are some of the best ingredients for making your own extracts:
- Vanilla beans
- Citrus zest
- Herbs and spices
- Coffee beans
- Nuts and seeds
When selecting your ingredients, make sure they’re fresh and high-quality. Look for organic options whenever possible to ensure that your extracts are free of pesticides and other chemicals.
How to Choose the Right Alcohol for Your Extract
Alcohol is the base ingredient for most extracts, as it extracts and preserves the flavor compounds in your ingredients. When it comes to choosing the right alcohol, you’ll want something that’s high-proof and neutral in flavor. Vodka is the most common choice, as it has a neutral flavor and won’t interfere with your ingredients’ taste. Other good options include rum, brandy, and bourbon, depending on the recipe.
Step-by-Step Guide to Making Vanilla Extract at Home
Vanilla extract is one of the most popular extracts, and for good reason. It’s versatile and adds a rich, warm flavor to both sweet and savory dishes. Here’s how to make it at home:
- Split 6-8 vanilla beans down the center, leaving the ends intact.
- Place the beans in a clean glass jar and cover them with 1 cup of high-proof vodka.
- Store the jar in a cool, dark place for at least 4-6 weeks, shaking it occasionally.
- After 4-6 weeks, strain the extract through cheesecloth or a coffee filter into a clean bottle.
- Your vanilla extract is now ready to use!
How to Make Lemon, Orange, and Other Citrus Extracts
Citrus extracts are a refreshing addition to many recipes, and they’re surprisingly easy to make. Here’s how to make a basic citrus extract:
- Peel the zest from 2-3 lemons or oranges, making sure to avoid the white pith.
- Place the zest in a clean glass jar and cover it with 1 cup of high-proof vodka.
- Store the jar in a cool, dark place for at least 2-3 weeks, shaking it occasionally.
- After 2-3 weeks, strain the extract through cheesecloth or a coffee filter into a clean bottle.
- Your citrus extract is now ready to use!
Creating Unique Flavors with Homemade Extracts
One of the best things about making your own extracts is that you can get creative with your flavor combinations. Try mixing different herbs, spices, and fruit to create unique and personalized extracts. Some popular flavor combinations include:
- Rosemary and thyme
- Cinnamon and vanilla
- Ginger and orange
- Lavender and lemon
Storing and Using Your Homemade Extracts
When it comes to storing your homemade extracts, you’ll want to keep them in a cool, dark place, away from heat and light. They can last for years if stored properly, so be sure to label them with the date and ingredients for future use. When cooking or baking with your extracts, be sure to use them sparingly, as they’re highly concentrated. Start with a small amount and adjust to taste.
How to Gift Homemade Extracts for Special Occasions
If you want to share the joy of homemade extracts, consider gifting them to friends and family. They make a thoughtful and unique gift, especially for foodies and bakers. Here are some tips for gifting homemade extracts:
- Use decorative glass bottles and labels to make them look attractive.
- Make a variety of flavors and package them together as a set.
- Include recipes or serving suggestions to inspire your recipients.
- Personalize them with handwritten notes or tags.
Common Mistakes to Avoid When Making Homemade Extracts
While making homemade extracts is relatively straightforward, there are some common mistakes you’ll want to avoid:
- Using low-quality ingredients
- Not sterilizing your equipment
- Using too much or too little alcohol
- Storing your extracts in the wrong place
By following the previous guidelines, you can avoid these mistakes and create high-quality, delicious extracts every time.
Troubleshooting Tips and Tricks for Perfect Homemade Extracts
If your homemade extracts aren’t turning out as expected, don’t despair. Here are some troubleshooting tips to help you perfect your extracts:
- Adjust the concentration by adding more ingredients or alcohol
- Try different ingredients or flavor combinations
- Experiment with different storage methods to find what works best for you
- Don’t be afraid to consult online resources or ask for help from the community
DIY Flavored Syrups: A Creative Use for Your Homemade Extracts
If you have leftover extracts or want to try something new, consider making flavored syrups. They’re perfect for adding to coffee, tea, cocktails, and desserts. Here’s how to make a basic flavored syrup:
- In a saucepan, combine 1 cup of sugar and 1 cup of water.
- Heat over medium-high heat, stirring until the sugar dissolves.
- Add 1-2 teaspoons of your favorite extract, depending on your taste preference.
- Simmer for 10-15 minutes until the syrup thickens.
- Allow the syrup to cool, then transfer it to a clean bottle.
Cooking and Baking with Your Homemade Extracts: Recipes and Ideas
Now that you have all these fantastic homemade extracts, it’s time to put them to use. Incorporate them into your cooking and baking to add an extra layer of flavor and complexity to your dishes. Here are some recipe ideas to get you started:
- Vanilla extract: Add to baked goods, custards, and dessert sauces.
- Citrus extract: Use in marinades, salad dressings, and cocktails.
- Mint extract: Mix into hot chocolate, ice cream, or cocktails.
- Almond extract: Add to glazes, frosting, and fillings for pastries and cakes.
Congratulations! You’re now an expert in making homemade extracts. With these tips and tricks, you can elevate your cooking and baking to the next level and impress your friends and family with your culinary skills.


