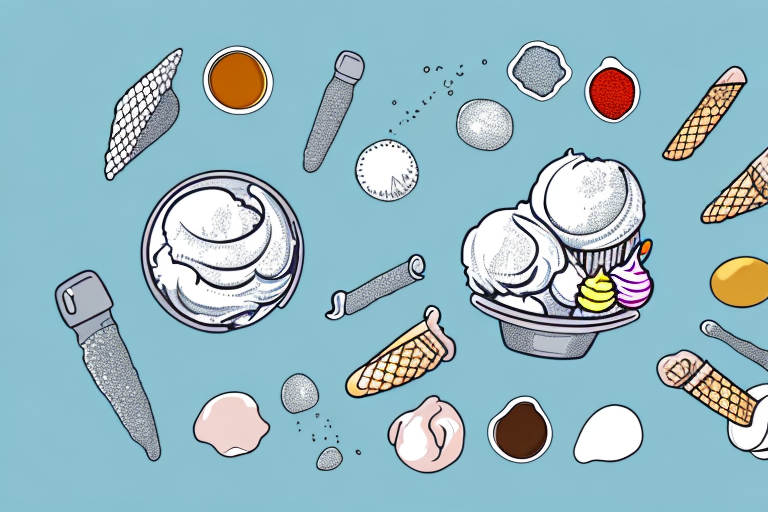
If you’re a fan of the creamy, cold treat that is ice cream, you might be interested in trying your hand at making it from scratch. Luckily, you don’t need a fancy ice cream maker to do so. In fact, with just a blender, you can make delicious homemade ice cream that will rival any store-bought brand. In this article, we’ll discuss the benefits of making ice cream at home, choosing the right ingredients, the different types of ice cream bases you can use in a blender, how to achieve the perfect consistency, customizing your ice cream with mix-ins and toppings, making dairy-free or vegan ice cream, blending techniques for adding air and minimizing ice crystals, troubleshooting common issues, and storing and serving your homemade ice cream for optimal flavor and texture.
The Benefits of Making Ice Cream at Home
Making ice cream at home has numerous benefits. First and foremost, you have complete control over the ingredients you use, which means you can avoid any additives or preservatives that you might find in commercial ice cream. This makes homemade ice cream a healthier choice, especially if you use high-quality ingredients like fresh fruit, organic milk, and natural sweeteners. Additionally, making your own ice cream can save you money in the long run, as you won’t have to constantly buy expensive pints from the store. Finally, making ice cream can be a fun and rewarding activity to do with family or friends, and you can create unique flavor combinations that you might not find in stores.
Another benefit of making ice cream at home is that you can customize the texture to your liking. Whether you prefer a soft-serve consistency or a firmer, scoopable texture, you can adjust the amount of cream and sugar in your recipe to achieve the perfect consistency. Additionally, making ice cream at home allows you to experiment with different toppings and mix-ins, such as nuts, candy, or cookie dough, to create a truly personalized dessert experience. Overall, making ice cream at home is a fun, creative, and delicious way to enjoy a classic treat while also controlling the quality of ingredients and saving money in the process.
Choosing the Right Ingredients for Homemade Ice Cream
When it comes to making homemade ice cream, the ingredients you use are key to creating a delicious end product. You’ll need a few basic ingredients to start with: a liquid base, a sweetener, and any flavorings or mix-ins you desire. For the liquid base, you can use heavy cream, half and half, milk, or even non-dairy alternatives like coconut milk or almond milk. Your sweetener can be anything from sugar to honey to maple syrup. And your flavorings can range from vanilla extract to fresh fruit puree to chocolate chips or nuts. It’s important to choose high-quality ingredients to ensure the best flavor and texture. Fresh, ripe fruit and pure vanilla extract are good examples of ingredients that can make a big difference in the taste of your ice cream.
Another important factor to consider when choosing ingredients for homemade ice cream is the fat content. The higher the fat content in your liquid base, the creamier and richer your ice cream will be. Heavy cream has the highest fat content, followed by half and half and then milk. Non-dairy alternatives like coconut milk can also provide a creamy texture due to their high fat content. However, it’s important to note that using a lower fat liquid base can result in a lighter, more refreshing ice cream. So, consider your personal preference and the type of ice cream you want to create when choosing the fat content of your ingredients.
The Different Types of Ice Cream Bases to Use in a Blender
When it comes to making ice cream in a blender, there are a few different types of bases you can use. One of the easiest bases is frozen bananas. Simply peel and slice ripe bananas, then freeze them until solid. Once frozen, blend the bananas in a high-speed blender until they are smooth and creamy, and you’ll have a deliciously healthy banana “ice cream”. Another option is to use a liquid base like heavy cream or coconut milk. Simply blend your base with your chosen sweetener and flavorings until smooth, then freeze in an airtight container until firm. You can also use a combination of frozen fruit and liquid base to create a blended ice cream that’s creamy and full of flavor.
If you’re looking for a dairy-free option, you can use a base made from soaked cashews. Soak raw cashews in water for a few hours or overnight, then drain and rinse them. Blend the cashews with a liquid base like almond milk or coconut milk, along with your chosen sweetener and flavorings, until smooth. Freeze the mixture in an airtight container until firm, and you’ll have a creamy and delicious cashew-based ice cream.
Tips for Achieving the Perfect Consistency with Your Blender
When making ice cream in a blender, achieving the perfect consistency can be tricky. If the mixture is too thin, you’ll end up with a slushy ice cream that won’t hold its shape. If it’s too thick, you’ll end up with a rock-hard block of ice cream. One key tip is to make sure your liquid base is chilled before blending. This will help the mixture freeze more quickly and prevent ice crystals from forming, which can ruin the texture of your ice cream. Additionally, you should blend your ingredients in short bursts, and use a spatula to scrape down the sides of the blender between bursts. This will ensure that all the ingredients are well blended and that there are no lumps or chunks. Finally, try to avoid over-blending your mixture, as this can also cause ice crystals to form and make your ice cream unpleasantly icy.
Customizing Your Homemade Ice Cream with Mix-Ins and Toppings
One of the best things about making ice cream at home is that you can customize it with any mix-ins or toppings you desire. From fresh berries to crushed cookies to hot fudge sauce, the possibilities are endless. When choosing mix-ins or toppings, try to think about flavors that complement your base. For example, if you’re making a chocolate ice cream, you might want to add some chopped nuts or caramel sauce for a salty-sweet flavor contrast. Similarly, if you’re making a fruity ice cream, you might want to add some fresh herbs like mint or basil for a pop of freshness. Don’t be afraid to get creative with your combinations!
Making Dairy-Free or Vegan Ice Cream in a Blender
If you’re lactose intolerant or vegan, you can still enjoy delicious homemade ice cream by using non-dairy ingredients in your blender. Coconut milk is a great choice for a creamy, dairy-free base, while almond milk or cashew milk can also work well. You can also use non-dairy yogurts or cream cheeses as a base for tangy, creamy ice creams. Just be sure to use a sweetener that complements the flavor of your non-dairy base, such as agave nectar or maple syrup.
Blending Techniques for Adding Air and Minimizing Ice Crystals
Air is an important factor in creating a creamy, smooth texture in ice cream. When you’re blending your ingredients in a blender, you can add air by blending in short bursts and scraping down the sides of the blender frequently. This will also help to minimize the formation of ice crystals, which can make your ice cream unpleasantly crunchy. To further minimize ice crystal formation, you can add a tablespoon or two of vodka or other alcohol to your mixture. Alcohol has a lower freezing point than water, which means it will help to prevent the mixture from freezing too solid. However, don’t add too much alcohol, as it can affect the flavor of your ice cream.
Troubleshooting Common Issues when Making Ice Cream in a Blender
Even if you follow all the tips above, there are still a few common issues that can arise when making ice cream in a blender. If the mixture is too thin or runny, try adding more frozen fruit or chilling the mixture in the freezer for 10-15 minutes before blending again. If the mixture is too thick or frozen solid, try letting it sit on the counter for a few minutes to soften before re-blending. If you’re experiencing ice crystal formation, try adding a bit more sweetener or a tablespoon of corn syrup to your mixture. Additionally, be sure to store your ice cream in an airtight container in the coldest part of your freezer to prevent ice crystal formation.
Storing and Serving Your Homemade Ice Cream for Optimal Flavor and Texture
Once you’ve made your delicious homemade ice cream, it’s important to store it properly to maintain its optimal flavor and texture. Be sure to transfer your ice cream to an airtight container as soon as it’s frozen solid, to prevent ice crystal formation. You can also press a layer of plastic wrap or parchment paper onto the surface of the ice cream to further prevent ice crystals. When you’re ready to serve your ice cream, let it sit at room temperature for a few minutes to soften before scooping. You can also run your ice cream scooper under hot water to make it easier to scoop, and use a warmed serving spoon to prevent the ice cream from sticking to the spoon. Enjoy!


