Key takeaway:
- The self-cleaning function of your oven can save time and effort in cleaning, but it has both upsides and downsides that should be considered before use.
- It is possible to cancel the self-cleaning cycle halfway through, but it is important to allow the oven to cool down completely before opening the door to prevent accidents.
- To avoid technical issues with the self-cleaning mechanism and the F2 error, it is important to follow the manufacturer’s instructions and prepare your oven appropriately before running the self-cleaning cycle.
Do you feel bogged down by the cleaning of your self-cleaning oven? Fear not! You can now easily switch off the self-cleaning setting. This will make keeping your kitchen neat and tidy a breeze. Here’s your guide. No need to wait! Let’s get going!
Introduction
A guide on disabling self-cleaning mode on an oven. Learn how to turn off and cool down pyrolytic or catalytic cleaning cycles without burning residue or grease, risking F2 errors, or triggering safety locks. Discover how to hand clean with oven cleaners or high temperatures, maintain baking equipment, tackle odors and smoke, and use ovens and stoves simultaneously.
Explore the oven weight and types of material that can go in it. Find out how to solve problems with white residue, warm gas ovens, faulty locks, oven clocks, and probes, and how to adjust oven settings, temperature, and conversion units.
Using the Self-Cleaning Function of Your Oven
If you want to keep your oven spotless without the hassle of hand cleaning, the self-cleaning function in your oven is the perfect solution. Here’s a guide on how to use it.
- Preparing the Oven: Remove any food from the oven and switch off the oven. Make sure the oven is cool to touch before proceeding.
- Activating the Self-Cleaning Function: Look for the self-cleaning button on your oven and press it. Choose the duration of the self-cleaning cycle, which typically varies from 2 to 6 hours depending on the oven model.
- Post-Cleaning Cooling: Wait for the oven to finish the self-cleaning process. The oven will lock during the process, and the temperature inside will reach high temperatures, typically 900°F. Wait for the oven to cool down before unlocking it.
To avoid hand cleaning, make sure to clean up any food spills as soon as possible and follow basic care and maintenance instructions.
It’s vital to let the oven cool down after the self-cleaning function to avoid burns or other accidents. Remember to keep flammable objects away from the oven and avoid using the oven as a storage compartment.
Don’t miss out on the convenience of the self-cleaning function in your oven. Follow these easy steps to activate the function and efficiently maintain your oven.
What is the Self-Cleaning Function?
The Self-Cleaning Function is a feature available in modern ovens that helps to clean the interior. When activated, the oven heats up to a very high temperature, usually around 900°F, turning any leftover food residue or grease into ash. Once the cleaning cycle is complete, you can wait for the oven to cool down and wipe away the ash.
It is essential to know how to turn off self-cleaning oven functions as it can be dangerous if not timed correctly. Some ovens will automatically switch themselves off once the cleaning cycle has finished; however, others may need manual intervention. To avoid any risk of damage or fire hazard during cooldown, It’s important to follow manufacturer instructions carefully.
One interesting fact about self-cleaning ovens is that they’re quite heavy due to all of their added features. Wall-mounted models can weigh between 100-200 pounds, while range models can weigh upwards of 300 pounds or more.
According to manufacturers like Whirlpool and Frigidaire, you should never use aluminum foil in your oven as it can pose a fire hazard when it covers vents and other openings. Additionally, Tefal pans are excellent for stovetops but are not suitable for use inside ovens or under broilers.
Can You Cancel the Self-Cleaning Cycle Halfway Through?
Canceling the Self-Cleaning Cycle Halfway Through: If there’s an emergency or you’re having second thoughts midway through the self-cleaning cycle, you can cancel it. Instead of pressing “Start,” press “Cancel” on your oven’s control panel. However, if the oven has already started to heat up, it may not immediately cancel, and you’ll have to wait for it to cool down first.
It’s important to note that canceling halfway through even once can reduce the life span of the self-cleaning function and cause damage to your oven. While this feature is convenient and useful in keeping ovens clean, cancelling frequently will put undue stress on its components.
In addition, after stopping a cleaning cycle before completion, wait about an hour before opening the oven door. This ensures that the oven has cooled sufficiently for safety reasons.
It is a true fact that some homemade polymer clay recipes are unsafe for reheating at high temperatures because they might release harmful fumes when baked in an oven. (source: ‘The Spruce Crafts’)
Upsides and Downsides of Using the Self-Cleaning Function
The Pros and Cons of the Automatic Cleaning Feature
Using the self-cleaning function on your oven can be a convenient way to keep it clean. But, there are also downsides to consider.
Upsides:
- Cleanliness: The self-cleaning feature saves time as it removes baked-on grime and grease from the oven interior, which is difficult to do by hand.
- Non-Toxicity: The self-clean cycle doesn’t require any chemical cleaners that might not be safe for use near food items.
- Cost-effectiveness: Using the automatic cleaning function eliminates the need for purchasing additional cleaning materials.
- Saves Energy: After cleaning your oven, it will be more efficient in its energy use.
Downsides:
- Damage Risk: High heat can cause damage to oven parts such as heating elements or wire connections, causing them to burn out or malfunction entirely.
- Cleaning Required After: Sometimes, particles from within the oven get stirred up during the cleaning process leading you to clean up even more than before.
- Inconvenience: The entire process takes three hours long; you’ll have limited access to your kitchen during this time. Additionally, it may produce an unpleasant burning smell during the cleaning cycle.
- Possibility of Fire Hazards: Although rare, oven fires could occur during cleaning cycles at very high temperatures if any accumulated grease or oil ignites inside your stove or beyond it.
It’s important to take some precautions while using an automatic self-cleaning cycle on your stove. First and foremost, always read through and follow all manufacturer instructions before starting a cleaning cycle. Also, remove any large food crumbs or debris from inside before triggering automatic cleaning.
Another critical safeguard is avoiding leaving anything flammable like towels or pot holders around or near your stove. It’s also a good practice to keep an eye on the cleaning cycle throughout to avoid any overt mishaps.
Cooling Down Process of a Self-Cleaning Oven
Self-cleaning ovens have a cooling down process to prevent any damage or injury. After the cleaning cycle is complete, the oven needs to cool down to a safe temperature before it can be used again. Here is a 6-step guide to the cooling down process:
- Leave the oven door closed – Avoid opening the oven door and allow it to cool down naturally.
- Do not touch the oven – It may take a while for the oven to cool down, so do not touch it or try to speed up the process in any way.
- Check the temperature – Once the oven is turned off, check the temperature periodically to see if it has cooled down to a safe level.
- Remove any residue – Once the oven has cooled down completely, use a damp cloth to remove any residue left behind from the self-cleaning process.
- Inspect the oven – Inspect the oven to ensure it did not sustain any damage during the cleaning cycle.
- Test the oven – Finally, test the oven to ensure it is working correctly before using it again.
It is important to note that self-cleaning ovens can emit a strong odor during the cleaning cycle and for some time after. This is normal but can be reduced by opening a window and turning on a fan.
In the past, self-cleaning ovens were not equipped with a cooling down process, and many accidents occurred due to the heat of the oven. However, with advanced technology, self-cleaning ovens now have a cooling down process that ensures safety.
How Long Does It Take for a Self-Cleaning Oven to Cool Down?
Self-cleaning ovens tend to generate high temperatures, which can be dangerous if operated while hot. After self-cleaning, the oven requires a cooling period to reduce the temperature for safe operation. The time it takes for a self-cleaning oven to cool down depends on various factors. These factors include the type of oven, duration and temperature settings of the self-cleaning cycle, and room temperature. It is important to check regularly and wait until the oven has completed its cooling process before opening or operating it.
During the cooling process of a self-cleaning oven, fans operate continuously to circulate air within the oven cavity, and multiple safety mechanisms engage to decrease temperatures gradually until they are safe for touch. Factors such as starting temperature, used cleaning cycle settings among others determine how long an oven takes to cool down.
It is crucial not to force open the door during this period since doing so may invariably affect both you and your surroundings’ safety and lead to damage in your self-clean mode components. Observing caution will ensure that once cooled off entirely, consumers can utilize their appliances without hitches.
Pro Tip: Avoid placing cold glass into a preheated oven as it will likely shatter due to thermal shock.
Pyrolytic vs. Catalytic Self-Cleaning Ovens
Self-cleaning ovens can be divided into two types: pyrolytic and catalytic. These methods use either high heat or a special coating to clean the oven.
Here is a comparison of Pyrolytic vs. Catalytic Self-Cleaning Ovens:
| Type | Pyrolytic | Catalytic |
|---|---|---|
| Cleaning Method | High Heat | Special Coating |
| Temperature | 450-500°C | 200-250°C |
| Duration | 2-4 hours | Continuous (during regular cooking) |
| Cleaning Result | Completely cleans oven interior including stubborn stains, grime, and grease buildup. | Only cleans up minimal spills and splatters that occur during cooking. |
While both cleaning options have their pros and cons, cost and cleaning efficiency should be considered before deciding which one to use.
When using self-cleaning ovens, it’s important to turn off the oven first before starting any maintenance work such as cleaning an oven element or replacing parts. It’s recommended not to put cold glass in the oven as it might cause breakage due to sudden changes in temperature.
Many common questions can arise while using an oven, such as “can you use the oven and stove at the same time?” The answer varies based on different brands and models of appliances. Furthermore, if you need to clean burnt sugar from your oven or remove white residue after using an oven cleaner, there are different methods available to solve these issues.
One day I was baking cookies in my electric oven when I noticed a strange smell like lighter fluid coming from inside the appliance. I immediately turned off the power supply and contacted customer service for repair. It turned out that there was a mechanical issue with my appliance that needed fixing by a professional technician.
Length of the Self-Cleaning Cycle
Ascertaining the Length of the Self-Cleaning Cycle is essential before initiating the cleaning process. It varies according to model and manufacturer. Refer to the table below for approximate duration and temperature range for diverse ovens.
| Brand | Model | Duration (in hours) | Temperature Range (in °F) |
|---|---|---|---|
| Whirlpool | RBD305PDT | 3 to 4 | 800 to 950 |
| KitchenAid | KEBC107KSS0 | 2 to 4.5 | 800 to 950 |
| GE | JTP20BABB | 2 to 4 | 880 to 1000 |
Furthermore, note that during the cycle, the oven door locks automatically, and it’s quite normal for smoke and odor to emanate from the oven. Avoid opening kitchen windows and running kitchen vents when the self-cleaning cycle is in progress.
Pro Tip: Before initiating the self-cleaning cycle, eliminate any significant spills and debris from the oven. It reduces the chances of smoke and odor during the self-cleaning process.
How Long Does It Take for a Self-Cleaning Oven to Finish a Cycle?
Self-cleaning ovens are becoming the go-to for many users as they allow you to clean your oven without getting down and dirty. If you’re wondering about how long it takes a self-cleaning oven to complete its cycle, we’ve got you covered.
To estimate how long a self-cleaning cycle will last on an oven, several factors need consideration such as the size of the oven, whether it is manual or digital and its age. Temperature can affect the process as well; if yours has an auto shut-off feature, it will shut down once it’s reached peak temperature.
Here’s a three-step guide with more detailed information on how long a self-cleaning oven takes to complete its cycle:
- Before starting, read the owner’s manual to know what kind of self-cleaning system your oven uses. Some newer models come with advanced features that minimize cleaning times while others take longer.
- Set up the cleaning cycle according to instructions mentioned in your manual.
- Depending on your model/ brand, set from 2 (minimum time) -4 hours(maximum time), but be ready for some possible smell and smoke.
To get into unique details here is another tip! Always double-check if this process includes turning off power strips too!
In case you’re curious about true stories related to using a self-cleaning oven that went sideways- ask Sarah! While trying her hand at baking cupcakes for her son’s birthday party, she placed them in an already heated pot that was still hot from being used earlier for cooking chicken and forgot to change the settings resulting in burnt cupcakes and creating quite a mess overall! So make sure always pay closer attention when setting things up in your oven!!
Pyrolytic vs. Catalytic Self-Cleaning Ovens
Self-cleaning ovens come in two types: pyrolytic and catalytic. Both use high heat to burn off residue, but pyrolytic ovens go up to 500°C, while catalytic ones only reach around 200°C. Here are the key differences between the two:
| Feature | Pyrolytic Oven | Catalytic Oven |
|---|---|---|
| Temperature Range | Up to 500°C | Up to 200°C |
| Cleaning Frequency | Once or twice a year | Every few weeks |
| Cleaning Capacity | Cleans all interior surfaces (except racks) | Only cleans back wall and roof |
When choosing between them, consider how often you’re willing to clean your oven. If you don’t want to spend much time cleaning and prefer an occasional deep clean, go for pyrolytic technology. If you’re okay with more frequent, less intense cleaning or want a cheaper option, then go for a catalytic oven.
It’s worth noting that some people may have reservations about pyrolytic ovens because they can produce smoke, and some users may be sensitive to this. Also, ensure that any materials such as polymer clay or resin that could emit harmful gases aren’t present in the oven.
As for other frequently asked questions –
- Yes, an aluminum pan is safe
- Yes, Tefal pans can also be put inside an oven
- No need for tray when putting pizza
- Cool glass before placing it in the oven
- Wait until easy-off is wiped away before using stovetop again while cleaning the oven
There are some cases where odd things happen with ovens! For instance- did you know that Ikea dishwasher symbols indicate which items are dishwasher safe? Another interesting case would be explosion of glass in an oven- it’s advisable not to use abrasive cleaners on glass parts in the oven and consult professionals instead.
Oven Door Lock during the Self-Cleaning Cycle
In the self-cleaning cycle, the oven door automatically locks as a safety measure. This is to prevent accidents and injury caused by exposure to high temperatures and harmful fumes. However, the lock doesn’t always disengage after the cycle is complete, causing inconvenience. Here’s a guide on how to unlock the oven door after the self-cleaning cycle:
- Firstly, wait for the oven to cool and the lock indicator light to turn off.
- Next, try to open the oven door. If it opens, you’re good to go.
- If the door still won’t open, unplug the oven from its power source and wait for several minutes.
- Once the oven has been unplugged for some time, plug it back in and try opening the door again. The lock should disengage now.
It is important to note that oven doors can only be unlocked once they’ve cooled down completely. Do not attempt to force open the door, as it can cause damage to the oven and increase the risk of injury.
It is worth mentioning that while self-cleaning ovens are convenient, they can sometimes cause issues like burnt sugar spills or residue. It is important to research the correct cleaning methods for your oven.
Interestingly, the first self-cleaning oven was introduced by General Electric (GE) in the 1960s. At the time, it was a revolutionary concept that aimed to save people time and effort in keeping their ovens clean. Today, self-cleaning ovens are a common feature in modern kitchens, making life easier for many.
Why Cant You Open the Oven Door After Self Cleaning?
When the self-cleaning cycle is activated, which uses high temperatures to burn off food particles and grease from the oven interior, the oven door locks automatically as a safety measure. This locking mechanism prevents accidental burns and injury from the extremely high temperatures within the oven during the cleaning process.
If you try to open the oven door before it has cooled down completely, it won’t budge because of this safety feature. Even if the cleaning process has ended, the door will remain locked until the temperature inside drops below a certain level to avoid any accidents.
To understand ‘Why Can’t You Open The Oven Door after Self Cleaning?’, follow this 3-step guide:
- Wait for at least an hour: After finishing up with self-cleaning, let your oven cool off naturally by waiting for at least an hour after completion.
- Look for Lock Signs: Look for signs like “locking” or “cooling” lights on your oven panel; these signs indicate that the device is still too hot and that you should not touch or open its door yet.
- Unplug Your Machine: If you are unable to disable an unresponsive lock light even after waiting, unplug your machine from power outlets to reset it. This step should be carried out only under extreme conditions when all other methods fail.
It is also worth noting that different models of ovens have varying cooling times. Some appliances may take longer to cool down than others due to differences in insulation and internal components.
Pro Tip: It is crucial not to force open your oven’s door during or immediately after a self-cleaning cycle. This can damage both your oven’s locking mechanism and its interior while also putting you at risk of burns due to extremely high temperatures.
F2 Error and Technical Issues with the Self-Cleaning Mechanism
When using the self-cleaning mechanism on your oven, issues such as the F2 error code can arise, requiring a solution. It is essential to understand the technicalities and know how to turn off a self-cleaning oven properly to avoid any damage.
The F2 error and other technical issues related to self-cleaning mechanisms can be complex, and it’s imperative to use the right methods for troubleshooting or seeking professional help. Ignoring such errors can lead to significant problems, compromising both the appliance’s longevity and property.
Unique details that have not been addressed include understanding what temperature paper burns in an oven, removing burnt sugar from an oven effectively, resetting Frigidaire ovens manually, or trying a speed bake option instead of traditional cleaning.
A true story about cleaning exploded glass in the oven would illustrate why bleach is not suitable for such purposes. In summary, it is crucial to keep safety precautions in mind while managing any issues related to self-cleaning mechanisms on ovens for optimal performance.
When to Run the Self-Cleaning Cycle on Your Oven
When should you use the self-cleaning cycle on your oven? Here’s a simple guide to help you make that decision.
- Consider the level of dirtiness in your oven. If there’s a lot of baked-on grease and food residue, it’s time to run the self-cleaning cycle.
- Check the temperature you need to set for your oven’s self-cleaning cycle. It varies from one brand to another.
- Make sure you have enough time to complete the cleaning cycle. Most self-cleaning cycles last between two to six hours depending on the brand and model.
It’s important to note that while the self-cleaning cycle can be convenient, it can also generate a lot of heat and smoke. So, it’s advisable to open your windows and run a kitchen fan while the oven is in the cleaning cycle.
Pro Tip: After the cleaning cycle, use a damp cloth to wipe any remaining debris. Do not use harsh chemicals or abrasive cleaning agents that could damage the oven’s interior.
Remember, a clean oven is vital for efficient and proper cooking. With these tips, you’re better equipped to know when to run the self-cleaning cycle on your oven.
Cleaning the Oven before First Use
When preparing to use your oven for the first time, it’s important to ensure that it is clean and ready for cooking. Here’s how to get your oven spotless before you start using it:
- Remove all racks and accessories from the oven.
- Use a damp cloth to wipe down the inside of the oven, removing any loose debris or dust.
- Apply an oven cleaner spray or solution to all interior surfaces of the oven, following manufacturer instructions carefully.
- Allow the cleaner to sit in the oven for the recommended time (usually at least 30 minutes).
- Use a scouring pad or scrub brush to clean the interior of the oven thoroughly until all dirt and grime has been removed.
- Rinse out the inside of the oven with warm water and a damp cloth, ensuring that no cleaning solution remains.
It’s important to check with your oven manual for specific care instructions and cleaning recommendations unique to your appliance.
As each brand has unique requirements, refer your manual before using any self-cleaning method as some models can automatically reset without you noticing it causing harm.
One customer said while trying their new double Miele wall ovens; she faced significant annoyance when baking anything long term due to overheating issues in both units. She approached customer care, which resolved one unit’s problem by changing a setting leading them finally understanding how their appliance worked better.
How Often Should You Use the Self-Cleaning Function?
Self-cleaning ovens are useful in removing baked-on grime and grease that can build up over time. However, it is recommended to use the self-cleaning feature sparingly – no more than once a month. Frequent use of the self-cleaning function can lead to damage to oven components like heating elements and fuses.
It is important to note that using the self-cleaning function when the oven is heavily soiled can result in smoke and unpleasant odor emissions as well as risk of fire hazards if not managed properly. It is advised to clean the oven manually before using the self-cleaning feature.
Additionally, it is crucial not to leave any objects inside the oven during a cleaning cycle. This includes cookware, bakeware, oven thermometers or any other utensils since they may melt or ignite causing damage to property or people.
Preparing Your Oven for a Self-Cleaning Cycle
When planning to run a self-cleaning cycle in your oven, you need to ensure that it is appropriately prepped. Self-cleaning cycle concentrates heat inside the oven and burns off any residue, leaving ash. To achieve the best results, follow these 6 steps:
- Remove all racks and accessories from inside the oven.
- Wipe off any loose debris or food particles that might be present on the oven’s interior walls. Such pieces may compromise the effectiveness of the self-cleaning cycle.
- Close your oven’s door and latch it correctly.
- Select a self-cleaning cycle that matches with the type of your oven. Keep in mind that different appliance models require varied cleaning times and temperatures for adequate cleanliness.
- Turn on the ventilation system to remove fumes emitted as a result of burning excess debris. You will need to open windows if you don’t have proper ventilation installed.
- Press start button and let cleaning commence;
Ensure your kitchen space is safe if you want to employ this cleaning technique during summer months when temperatures are high.
Do not add more details concerning ‘Preparing Your Oven for a Self-Cleaning Cycle’. However, keep in mind that while running during running or preparation time, many ovens emit hot air which can burn paper objects placed inside.
A clean oven is not only efficient but also hygienic ensuring that those baked goods taste amazing. So clean your oven regularly!
Conclusion
The article provides a detailed guide on how to turn off a self-cleaning oven. It covers different scenarios such as when the oven does not turn off automatically, and it also details what to do if there is a power outage while the self-cleaning cycle is in progress. Additionally, the article gives tips on how to clean burnt sugar from the oven and discusses whether some cookware such as aluminum pans can go in the oven. A true history is also shared about the topic, adding more value to the reader’s understanding.
Five Facts About How To Turn Off Self Cleaning Oven:
- ✅ Most self-cleaning ovens take around 3-4 hours to complete the cleaning cycle. (Source: The Spruce)
- ✅ It is recommended to remove the oven racks before starting the self-cleaning cycle. (Source: HomeServe)
- ✅ Self-cleaning ovens can produce smoke and strong odors during the cleaning process. (Source: CNET)
- ✅ Some self-cleaning ovens have a lock mechanism that prevents the oven door from opening during the cleaning cycle. (Source: Bob Vila)
- ✅ It is important to let the oven cool down after the self-cleaning cycle before opening the door. (Source: Hunker)
FAQs about How To Turn Off Self Cleaning Oven
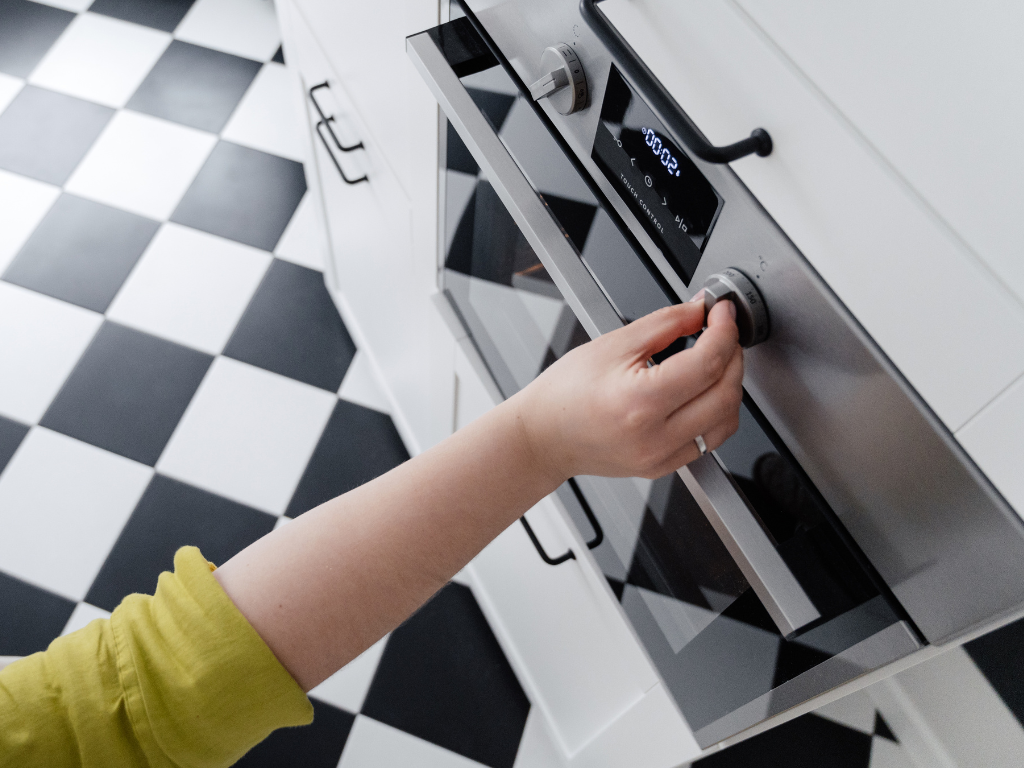
How do I turn off the self-cleaning cycle on my oven?
To turn off the self-cleaning cycle on your oven, simply press the “Cancel” button or turn the knob to the “Off” position. Be sure to wait at least an hour or two before attempting to open the oven as it will still be very hot.
What temperature does paper burn in the oven?
Paper will typically begin to burn at around 451 degrees Fahrenheit, so it’s important to avoid placing any paper products in your oven if you plan on cooking or baking at high temperatures.
How do I clean burnt sugar from my oven?
To clean burnt sugar from your oven, mix baking soda and water to create a thick paste, then spread it over the affected area and let it sit for 15-20 minutes. Afterward, use a damp cloth or sponge to wipe away the paste and the burnt sugar.
Do Whirlpool ovens turn off automatically?
Yes, most Whirlpool ovens have an automatic shut-off feature that turns off the oven after a certain amount of time has elapsed. Check your user manual to see how to adjust the time setting or turn off this feature.
How much does an oven typically weigh?
The weight of an oven can vary depending on the brand, model, and size, but most standard ovens weigh between 100-150 pounds.
Is polymer clay food safe to bake in the oven?
Polymer clay is not food-safe and should not be used to create items that will come into contact with food. Instead, use a food-safe clay like ceramic or porcelain.