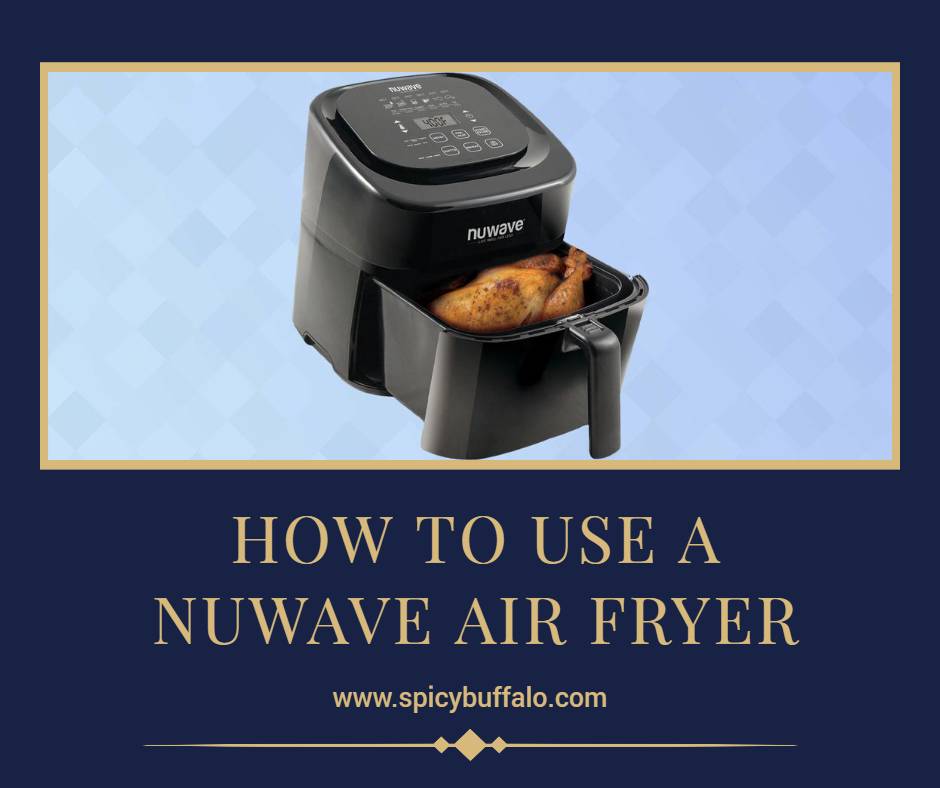
The NuWave Air Fryer is a great way to cook your favorite foods without the unhealthy oil. To use your NuWave Air Fryer, you’ll need to familiarize yourself with the digital touch screen. You can set the temperature and time settings by using the up and down arrow buttons. The NuWave Air Fryer even has a preheat option, allowing you to put in your food after the fryer reaches the desired temperature.
Setting up the Air Fryer
Clean the appliance and accessories before using them. Use a mild dish soap and clean water to rinse off all of the accessories, such as the basket and base tray, before using them. Use a damp cloth to wipe down the appliance — you don’t want to submerge this in water.[1]
Set up the air fryer on a stable, heat-resistant surface. When choosing a spot for your air fryer, place it on an even surface that’s heat resistant, most likely in your kitchen. Keep it away from large amounts of water, like the sink. Make sure the air vent isn’t blocked or covered.[2]
Place the base tray and basket in the air fryer. To get your air fryer ready for use, fit the fry pan basket into the base tray. Now slide both the base tray and the basket into the air fryer.[3]
Plug the air fryer into a standard wall socket. Find the nearest outlet and plug in your air fryer. The air fryer comes with a 4 feet (120 cm) cord, making it easier to reach the outlet.[4]
Operating the Air Fryer
Press the On/Off button to turn the air fryer on. Pressing the On/Off button on the digital touch screen will turn on the air fryer, lighting up the controls. The control panel should read “0,” showing that you haven’t selected a cooking temperature or time yet.[5]
To turn the air fryer off, simply press On/Off again.
Place the food inside the base tray. Slide the base tray out using the handle and put your chosen food onto the tray. Once all of your food is set on the tray, slide the tray back into the air fryer.[6]
Press Start/Pause to begin cooking on the default setting. Once your food is in the air fryer, press the Start/Pause button to enable the default setting. This will begin cooking your food at 360 °F (182 °C) for 10 minutes.
Changing the temperature and time settings manually is talked about in the next section.
Use the Start/Pause button to pause the cooking process. If you need to momentarily stop the air fryer, press the Start/Pause button while it’s cooking. This should pause the cooking process, allowing you to remove the base tray, if necessary.[7]
Press the Start/Pause button to resume cooking.
If you press Pause and don’t hit any other buttons within 5 minutes, the time and temperature settings will be cleared.
Use the On/Off button to clear all of the settings. If you pause the air fryer to remove your food before the timer is done and you don’t want to put the food back in, press the On/Off button. This should clear all of the settings and turn off the fryer.[8]
Setting the Cooking Temperature and Time
Find out the temperature and time you’ll need to set for your food. You NuWave Air Fryer should come with an instruction booklet containing a few recipes. Look at the chart to find out how long to cook your chosen food, as well as at what temperature.[9]
For example, if you’re making homemade fries, you would set the temperature to 360 °F (182 °C) for 18-30 minutes.
You can find many air fryer recipes online that will tell you the temperature and time settings.
Press the Temp/Time button once to set the cooking temperature. Find the Temp/Time button on the digital touch screen at the bottom left of the screen. Press the Temp/Time button 1 time to activate the temperature controls.[10]
The “Temp” button should be flashing, and the default setting of 360 °F (182 °C) should be showing as well.
Adjust the temperature using the up and down arrow buttons. After the temperature settings pop up, you can use the up and down arrows on the right of the screen to set the desired temperature. The temperature will change by 5 °F (−15 °C) each time you press an up or down arrow.[11]
Hold the arrow down to adjust the temperature in 50 °F (10 °C) increments.
If you need to change the temperature while the food is already cooking, you can use this same process.
Press the Temp/Time button twice to set the cooking time. While you pressed the Temp/Time button once to change the temperature setting, pressing the Temp/Time button twice will allow you to set the timer. This should bring up the time settings, showing you the digital clock.[12]
”Time” should be flashing, and the default setting of 10 minutes should be displayed.
Press the up and down arrows to adjust the time by 1 minute. The arrows on the right of the screen can be used to set the desired cooking time. Pressing on an arrow will increase or decrease the time by 1 minute. If you want to speed up the settings, you can hold down the arrow button, adjusting the time in 10-, 20-, and then 30-minute increments.[13]
If you’re cooking between 100 °F (38 °C) and 345 °F (174 °C), the air fryer can cook for up to 99 hours and 59 minutes.
If you’re cooking between 350 °F (177 °C) and 390 °F (199 °C), the air fryer can cook for up to an hour.
Place your food in the basket immediately to start cooking. Unlike preheating, you can place your food into the air fryer right after you’ve chosen the temperature and time. Slide the base tray and basket back into the air fryer carefully once it contains your food.[14]
There’s no need to wait for the air fryer to warm up — it will start cooking as soon as you press start.
Don’t fill the basket more than ⅘ full.
Don’t use the base tray without the basket in it.
Press Start/Pause to begin the timer. Once your food is in the air fryer, press the “Start” button. This will allow the timer to start counting down, and your food will begin cooking.[15]
Preheating the Air Fryer
Use the “Preheat” button for crispier foods. Preheating the air fryer before putting your food in will allow it to get to the perfect temperature first. Once you use the Preheat setting, the air fryer will notify you once it’s ready for you to insert the food.[16]
The Preheat option is great for foods like chicken tenders, fries, or frozen appetizers.
Preheat the air fryer using the preheat button. After you’ve turned the air fryer on using the On/Off button, press “Preheat.” Then, press the Temp/Time button once to set the cooking temperature, and then press the Temp/Time button again to choose the right cooking time.[17]
If you’d rather use the default setting of 360 °F (182 °C) for 10 minutes, stop after pressing the Preheat button.
Press Start/Pause to begin the preheating process. Once the temperature and time have been keyed in, hit Start/Pause on the digital touch screen. This will cause the air fryer to begin preheating.[18]
When you press start, the screen will display the current temperature, so don’t worry if it’s not the same as the one you’re preheating the air fryer to.
Wait for the beep and “Ready” signal. When the air fryer has reached your desired temperature, it will beep and the screen should say “Ready.” Once the fryer beeps, you need to insert your food within 5 minutes.[19]
The time that you set for the food to cook won’t start counting down until the air fryer has preheated.
Insert the food into the fryer to begin cooking. Once you insert the basket into the air fryer after it has preheated, the timer will automatically begin counting down. There’s nothing that you need to press to start the cooking process.[20]
Make sure you don’t fill the basket all the way up with food.
Don’t use the base tray by itself in the air fryer.
Press the Start button twice to add food before it’s preheated. If you pressed Preheat but want to insert your food before the air fryer has reached the desired temperature, press the Start button twice. This will start the timer immediately so that your food will cook for the set time.[21]
Note that you don’t need to preheat the air fryer if you’ve just cooked something — it will still be hot.
Removing the Basket or Grill Pan
Pull the basket and base tray straight out for removal. To take the basket or grill pan out of the air fryer, hold onto the handle and pull straight out. This should remove the basket/grill pan and base tray. Be careful not to press the demounting button on the handle when you’re pulling them out.[22]
Place the base tray on a heat resistant surface. Once you’ve removed the basket/grill pan and base tray, set the base tray down on a surface that won’t be damaged by the heat. This could be a potholder, silicone pad, or any other type of heat resistant surface.[23]
Remove the basket from the base tray, if necessary. If you want to pour your food onto a plate or bowl from the basket, you can remove the basket from the base tray to get rid of unwanted weight. Lift the safety cover on the handle and press the demounting button. This will allow you to lift the basket from the base tray.[24]
You can repeat the same process using the grill pan accessory.
Interchange the basket and grill pan, when necessary. Both the basket and grill pan can be inserted into the base tray. Both accessories fit into the base tray and can be removed by pressing the demounting button.
The basket is best used with foods such as fries, onion rings, or other snacks. The grill pan can be used to cook steak, hamburger, and other meat.
Unplug the air fryer to let it cool. Before cleaning the air fryer, you’ll want to unplug the unit. Allow it to cool completely, waiting at least 15 minutes before checking to see if it’s still hot.[25]
Place the basket and base tray on a heat resistant surface once they’re removed from the air fryer to let them cool down faster.
Clean the air fryer and accessories after each use. After the air fryer has cooled, use a damp cloth to wipe down the appliance, making sure not to submerge it in water. You can clean the base tray and accessories using a mild soap with water, being careful to use a soft sponge so that they don’t get scratched.[26]
Submerging the appliance in water will cause damage.
Your air fryer and accessories need to be cleaned each time you use them.
If there’s food residue in the base tray, fill it with hot water and let it soak for 10 minutes before trying to clean it.
Do you put oil in NuWave air fryer?
As air fryers cook with convection, this means hot air is blown into the food. So, using oil can cause flare-ups and even burning of food.
Instead of putting oil in the basket of an air fryer, you should use a parchment paper or paper towels to blot excess oil. You can also use a heat-resistant silicone pad instead. RenuWave is not recommended to be used to cook with oil because it won’t work as efficiently as electric kitchen appliances.
What’s the difference between an air fryer and a NuWave?
Air fryers are great tools to help you cook healthier meals while still making them delicious. With many of the air fryers on the market, you’ll be able to cook French fries, chicken wings, and other things that you might normally deep fry at home. However, when it comes to NuWave products, their air fryers function differently.
While air fryers are used to create a healthier meal (and are usually considered a healthier homemade alternative to fried food), NuWave is known for its infrared technology that helps you cook your food more quickly and efficiently. Infrared technology uses heat from the surrounding materials in your kitchen (the walls, ovens, stovetops) rather than using extreme temperatures.
What is bad about air fryers?
While they are a fantastic tool to help you cook healthier meals, there are some things that you should be aware of when using your air fryer.
Don’t use metal utensils. Air fryers usually come with a special utensil that looks like a fork, but it’s actually made to catch the oil (the oil will drip out of the basket when you’re cooking). But, it’s important to note that these utensils might cause some damage to the unit while you’re using it. So, make sure that you know how to operate your air fryer before using them. You can use paper towels or parchment paper instead.
Don’t over-fill the basket with food. This can cause the damage of the appliance and make it more difficult to use. If you have to add too much food, you should remove some of it so that the basket doesn’t fill up with food. Of course, this won’t work if the basket has been used for other purposes (for example, a food processor or slow cooker).
Don’t cook for too long or at too high a temperature. You shouldn’t let your air fryer get too hot as that can damage your appliance. As discussed earlier, there is a safety feature built in to most NuWave air fryers that will automatically turn off the unit once it reaches a temperature of over 350 degrees Fahrenheit.
How do you air fry in a NuWave oven?
You can also use an NuWave oven to prepare delicious meals that you’ve prepared using your air fryer. Just follow the same instructions on heating up, cooking, and cooling as you would while using an air fryer. However, there are three main differences between the two:
There is no basket in an oven. Your food will be cooked directly on a baking tray without the basket in between you and the food. Of course, you can still cook with oil (which can get messy).
Air fryer oils are not recommended to use in ovens because they will cause burning of foods inside the unit. So, make sure that your equipment is clean before baking with it.
Air fryers should be preheated to a temperature of at least 400 degrees Fahrenheit before using them.
How many holes/pans should I use?
The number of holes in your air fryer will depend on your purpose. You might need more or less than recommended if you’re cooking different foods with it. For example, a small plate that fits in the basket may be used for one small chicken breast, whereas you would have to use the entire large basket for a large steak or multiple steaks. Once the basket is removed from the base tray and placed on another heat-resistant surface (tables, counters) make sure that you don’t put excess pressure on it. This will keep the basket in good condition.
How do you air fry with a NuWave Bravo?
A NuWave Bravo is an air fryer that has its own set of instructions for using it. It offers different features than other air fryers. These features include: preheating, a rotating rack, and a heat-resistant base pan to use in your oven or on the stovetop for recipes that require extra cooking time.
What do you cook in an air fryer?
The number of recipes that you can cook with an air fryer is limited only by your imagination. With some creativity and some basic knowledge of how to operate it, you’ll be able to cook healthy meals in no time at all.
How do you clean your air fryer?
To clean your air fryer, you have to follow the same process as you would if you were using it in a conventional oven. First, remove any accumulated food. Next, unplug the unit and turn it upside down in case there is any oil that has leaked out. Then, use a small brush to clean the upper and lower heating elements (the fan). Once they are clean, use a paper towel or cloth to wipe them dry. If your device has a removable tray inside that can be washed by hand, then you can do just that.
Can you put aluminum foil in the NuWave air fryer?
The NuWave air fryer is not designed to be used with aluminum foil. You can still use it this way, but the performance of your unit will be compromised.
How long can you use an air fryer?
In general, the lifespan of an air fryer is equivalent to a conventional oven. But, since NuWave products are made to last longer than conventional ovens, this might not be the case for all models of NuWave-influenced models. If you have any issues with your appliance after it has reached the end of its lifespan, contact a professional NuWave repair service center.
If you’re still on the fence about whether or not it’s worth your investment, just remember that air fryers have made a comeback recently. In addition, they have won over more people than ever before because of the innumerable advantages that they bring with them.
When was the last time that we encountered a product that was able to change our lives without bringing any inconvenience? If you’re interested in buying one, I highly encourage you to do so.