Are you experiencing issues with your Oster blender? Don’t worry, we’ve got you covered! In this article, we will guide you through the troubleshooting process to help you identify and fix common problems that may arise with your Oster blender. Whether it’s a jammed blade, a leaking jar, or a non-functioning control panel, we’ll provide you with all the necessary steps to get your blender back up and running smoothly.
Common Issues with Oster Blenders
Before we dive into troubleshooting, let’s take a look at some of the common problems that Oster blender users may encounter. These issues can range from minor inconveniences to more complex problems. Some of the most frequent issues include:
- Lack of power or blender not turning on
- Jammed blade assembly
- Leaking jar
- Non-functioning control panel
- Faulty on/off switch
- Overheating
Understanding these common issues will help us address them more effectively during the troubleshooting process.
In addition to the common issues mentioned above, another problem that Oster blender users may encounter is a malfunctioning motor. This can manifest as the blender running at a slower speed than usual or making unusual noises during operation. A faulty motor can be caused by various factors, such as worn-out motor brushes or a damaged motor winding. If you experience any motor-related issues with your Oster blender, it is recommended to seek professional assistance for repair or replacement.
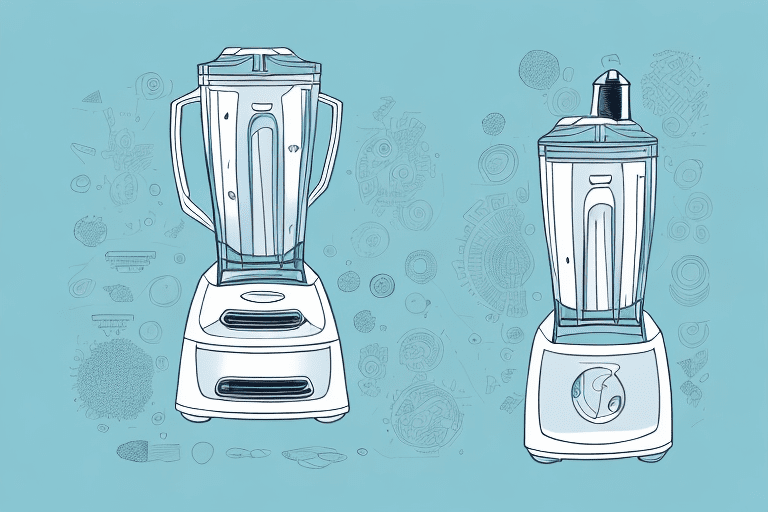
Understanding the Components of Your Oster Blender
Before we jump into troubleshooting, let’s familiarize ourselves with the different components of your Oster blender. Knowing these parts will make it easier to identify and fix any issues that may arise. The main components of an Oster blender include:
- Motor base
- Blade assembly
- Glass or plastic jar
- Lid with a cap or splash guard
- Control panel with various buttons and settings
Having a clear understanding of these parts will enable you to perform troubleshooting steps more confidently.
Let’s take a closer look at each of these components:
- The motor base is the foundation of the blender and houses the motor that powers the blades. It provides stability and support to the entire blender.
- The blade assembly is responsible for chopping, blending, and grinding ingredients. It is typically made of stainless steel and consists of sharp blades that rotate at high speeds to create a smooth blend.
- The glass or plastic jar is where you place your ingredients for blending. It is designed to withstand the high speeds and forces generated by the blades. Glass jars are often preferred for their durability and resistance to staining, while plastic jars are lightweight and less prone to breakage.
- The lid with a cap or splash guard helps prevent any spills or splatters during blending. It also ensures that the ingredients stay contained within the jar, allowing for a mess-free blending experience.
- The control panel is where you can find various buttons and settings to control the speed and duration of blending. It may include options such as pulse, low, medium, and high speeds, as well as pre-programmed settings for specific tasks like crushing ice or making smoothies.
By understanding the purpose and function of each component, you will be better equipped to troubleshoot any issues that may arise with your Oster blender.
How to Identify the Problem with Your Oster Blender
The first step in troubleshooting your Oster blender is to identify the specific problem you are facing. This will help us determine the appropriate course of action. Start by observing the blender’s behavior and ask yourself the following questions:
- Is the blender not turning on at all?
- Is it making unusual noises?
- Is it leaking when in use?
- Are some buttons on the control panel unresponsive?
Once you have identified the problem, we can move on to more specific troubleshooting steps tailored to your situation.
It is important to note that some problems with your Oster blender may require professional repair or replacement parts. If you are unsure about how to proceed or if the problem seems more complex, it is recommended to contact Oster customer support or a qualified technician for assistance. Attempting to fix the blender yourself without proper knowledge or tools may cause further damage or void any warranty that may be in place.
Checking the Power Source of Your Oster Blender
If your Oster blender is not turning on or lacks power, the first thing to check is the power source. Ensure that the blender is plugged into a functioning electrical outlet. You may also want to try plugging another appliance into the same outlet to rule out any electrical problems. If the power source is not the issue, we can move on to the next troubleshooting step.
Another potential issue to consider is the power cord of your Oster blender. Inspect the power cord for any visible damage or fraying. If you notice any damage, it is important to replace the power cord before using the blender again. Additionally, make sure that the power cord is securely connected to both the blender and the electrical outlet. Loose connections can cause a lack of power or intermittent functionality. If the power cord appears to be in good condition and properly connected, we can proceed to further troubleshooting steps.
Assessing the Blade Assembly of Your Oster Blender
If you’ve noticed that the blade assembly of your Oster blender is jammed or not working properly, you will need to take a closer look. Ensure that the blender is unplugged, then remove the jar from the motor base. Carefully inspect the blade assembly for any debris, such as food particles or ice that may be causing the jam. Clean the blade assembly thoroughly and reassemble it, making sure it is properly aligned. Once you’ve done that, plug the blender back in and give it a test run.
In addition to cleaning the blade assembly, it is also important to check the condition of the blades themselves. Over time, the blades may become dull or damaged, which can affect the blender’s performance. If you notice any signs of wear or damage on the blades, it may be necessary to replace them.
Another factor to consider when assessing the blade assembly is the tightness of the blade assembly nut. If the nut is loose, it can cause the blades to wobble or become misaligned, resulting in poor blending performance. Use a wrench or pliers to tighten the nut securely, ensuring that the blades are firmly in place.
Examining the Motor of Your Oster Blender
Is your Oster blender making strange noises or not blending your ingredients smoothly? The problem could lie with the motor. To examine the motor, start by unplugging the blender. Remove the jar and inspect the area where the jar connects to the motor base. Sometimes, debris can accumulate in this area and prevent the jar from sitting securely. Clean this area thoroughly and make sure there are no obstructions. If the motor still seems to be functioning improperly, it may be best to seek professional help or contact Oster customer support for further assistance.
Another potential issue with the motor could be overheating. If you have been using the blender for an extended period of time or blending large quantities of ingredients, the motor may become overheated. This can cause the blender to shut off or not function properly. To prevent overheating, make sure to give the motor a break between uses and avoid overloading the blender with ingredients.
In some cases, the motor may need to be replaced. If you have tried cleaning the blender and allowing it to cool down but the motor still does not work correctly, it may be necessary to replace it. Contact Oster customer support or a professional blender repair service to inquire about motor replacement options. They will be able to provide guidance on the best course of action to get your blender back up and running smoothly.
Troubleshooting a Jammed Blade in Your Oster Blender
If you’ve noticed that the blade assembly of your Oster blender is jammed and you can’t resolve the issue by cleaning it, we recommend being cautious. Unplug the blender and take it apart following the manufacturer’s instructions. Carefully remove the blade assembly and use a cloth or brush to clean it. Check for any worn or damaged parts that may be causing the blade to jam. If necessary, consider replacing the blade assembly or seeking professional help.
In addition to cleaning and checking for worn or damaged parts, there are a few other troubleshooting steps you can take if your Oster blender blade is still jammed. One option is to try lubricating the blade assembly with a food-safe lubricant, such as vegetable oil or silicone grease. Apply a small amount of lubricant to the moving parts of the blade assembly and then reassemble the blender. This can help reduce friction and make it easier for the blade to rotate smoothly.
If lubrication doesn’t solve the problem, another possible cause of a jammed blade could be a faulty motor. If you suspect that the motor is the issue, it’s best to contact the manufacturer or a professional blender repair service for assistance. They will have the expertise and tools necessary to diagnose and fix any motor-related problems.
Fixing a Leaking Jar in Your Oster Blender
A leaking jar can be a frustrating issue with your Oster blender. Start by ensuring that the jar is properly secured onto the motor base. Check if the gasket or sealing ring inside the lid is in good condition and properly in place. If the gasket is worn or damaged, replace it with a new one. Additionally, make sure you are not overfilling the jar beyond the maximum capacity, as this can cause leaking. If the problem persists, it may be advisable to reach out to Oster customer support.
Another possible cause of a leaking jar is a cracked or damaged jar itself. Inspect the jar for any visible cracks or chips. If you find any, it is recommended to replace the jar to prevent further leaking issues.
In some cases, the blender blade assembly may be the culprit behind the leaking. Check if the blade assembly is securely attached to the bottom of the jar. If it is loose or damaged, tighten or replace the blade assembly as necessary. It is also important to ensure that the rubber gasket between the blade assembly and the jar is in good condition and properly seated.
Dealing with a Non-Functioning Control Panel on Your Oster Blender
If certain buttons on your Oster blender’s control panel are unresponsive, try a simple solution first: unplug the blender and plug it back in. Sometimes, a quick restart can fix minor glitches. If that doesn’t solve the problem, check for any visible damage or debris on the control panel. Clean the panel gently, using a soft cloth or brush, to remove any dirt or residue that may be causing the issue. If the control panel still isn’t functioning as it should, it may be time to contact Oster customer support.
In some cases, a non-functioning control panel on an Oster blender may be due to a faulty electrical connection. To check for this, you can try plugging the blender into a different power outlet or using a different power cord. If the control panel starts working with these changes, it indicates that the issue lies with the electrical connection. In such cases, it is recommended to replace the power cord or have a professional inspect and repair the electrical components of the blender.
Repairing a Faulty On/Off Switch on Your Oster Blender
If the on/off switch of your Oster blender is faulty, it can cause frustration. Start by unplugging the blender from its power source. Inspect the switch for any visible damage or loose connections. If you notice any issues, try tightening the connections or replacing the switch if necessary. However, if you are not confident in your ability to repair it yourself, we recommend seeking professional assistance.
Before attempting any repairs, it is important to ensure your safety. Always unplug the blender from the power source to avoid any risk of electric shock. Additionally, make sure to work in a well-lit area with proper tools and equipment.
If you decide to replace the faulty switch, you can find replacement parts online or at a local appliance repair store. Make sure to purchase the correct switch model that is compatible with your Oster blender. Refer to the blender’s manual or contact the manufacturer for specific instructions on how to replace the switch.
Troubleshooting Overheating Issues in Your Oster Blender
If your Oster blender is overheating or shutting off unexpectedly during use, it’s important to address the issue promptly. To prevent overheating, make sure you are not overloading the blender with too many ingredients at once. Allow the blender to cool down for a few minutes before using it again. If the problem persists, check the ventilation areas on the motor base for any obstructions and clear them if necessary. Overheating can also be a sign of a more serious problem, so it’s a good idea to contact Oster customer support for further assistance.
Another possible cause of overheating in your Oster blender could be a faulty motor. If the motor is not functioning properly, it may generate excessive heat during operation. In this case, it is recommended to have the blender inspected and repaired by a qualified technician.
In addition to checking the motor, it is also important to examine the power source. Using an inadequate power supply or extension cord can lead to overheating issues. Ensure that the blender is plugged into a properly grounded outlet and avoid using long extension cords that may cause voltage drops.
Cleaning and Maintaining Your Oster Blender for Optimal Performance
To ensure the long-term performance of your Oster blender, regular cleaning and maintenance are crucial. After each use, be sure to wash the jar, lid, and blade assembly with warm, soapy water. If the blade assembly is removable, carefully disassemble it and clean each part separately. Additionally, wipe down the motor base with a damp cloth to remove any spills or debris. Regularly inspect and replace worn or damaged parts to avoid potential problems.
Seeking Professional Help for Complex Issues with Your Oster Blender
If you’ve exhausted all troubleshooting options and your Oster blender is still not working properly, it may be time to seek professional help. Contact Oster customer support or visit an authorized service center for assistance. Their experts will be able to diagnose the problem accurately and provide you with the best solution for your blender.
Tips for Avoiding Common Problems with your Oster Blender
To prevent common issues from arising with your Oster blender, here are some useful tips to keep in mind:
- Read the instruction manual thoroughly and follow the recommended guidelines for use and care.
- Avoid overloading the blender with too many ingredients, as this can strain the motor and cause overheating.
- Clean the blender regularly to prevent residue buildup and ensure optimal performance.
- Store the blender in a safe and dry place to protect it from potential damage.
- Handle the blender and its components with care to avoid accidental breakage or malfunction.
By following these tips, you can extend the lifespan of your Oster blender and minimize the chances of encountering common problems.
We hope this comprehensive guide has helped you troubleshoot and resolve any issues you may be facing with your Oster blender. Remember, patience and proper maintenance are key to ensuring optimal performance of your blender for years to come. Happy blending!