Are you experiencing issues with your Hamilton Beach blender? Don’t worry, you’re not alone! Blenders are handy appliances that make our lives easier, but they can sometimes encounter problems that prevent them from functioning properly. In this article, we will guide you through troubleshooting your Hamilton Beach blender step by step. Whether it’s a power problem, a blade malfunction, or a leaking issue, we’ve got you covered. So, let’s dive in and get that blender back in action!
Understanding the Basics of Your Hamilton Beach Blender
Before we delve into troubleshooting, let’s take a moment to familiarize ourselves with the key components of your Hamilton Beach blender. Understanding how your blender should function will help you identify the source of the problem.
Blenders have become an essential kitchen appliance for many households. Whether you’re making smoothies, soups, or sauces, having a reliable blender can make your culinary adventures much more convenient. The Hamilton Beach blender is known for its durability and performance, but to fully appreciate its capabilities, it’s important to understand its key components.
Key Components of the Blender
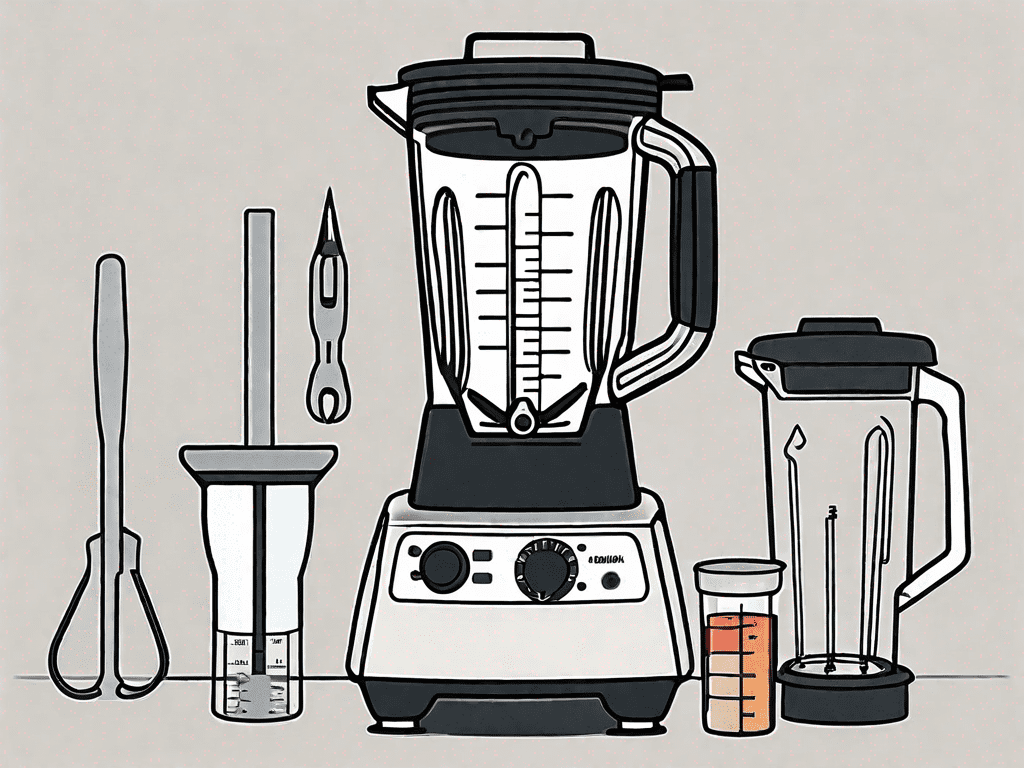
Your Hamilton Beach blender consists of several essential parts that work together to produce smooth and consistent blends. These include the motor base, blending jar, lid, blades, control buttons, and power cord. Each component plays a crucial role in ensuring the blender operates effectively.
The motor base is the heart of the blender, housing the powerful motor that drives the blades. It provides stability and support for the other components. The blending jar, usually made of durable plastic or glass, holds the ingredients and allows for smooth blending. The lid, with its tight seal, prevents any unwanted spills or accidents during operation.
The blades, often made of stainless steel, are responsible for chopping, blending, and pureeing the ingredients. They are designed to create a vortex that pulls the ingredients down into the blending jar, ensuring thorough mixing. The control buttons on the blender allow you to adjust the speed and intensity of the blending process, giving you control over the consistency of your blends. Lastly, the power cord connects the blender to a power source, providing the necessary electricity to operate the motor.
How Your Blender Should Function
When your Hamilton Beach blender is working correctly, you should experience powerful blending performance with smooth and efficient operation. The blades should rotate effortlessly, creating a vortex that pulls the ingredients down into the blending jar. This ensures that all the ingredients are thoroughly mixed, resulting in a smooth and consistent blend.
The motor base should provide stability and support, preventing any unnecessary vibrations or movements during blending. The blending jar should securely attach to the motor base, ensuring a tight and secure fit. This not only prevents any accidents but also allows for efficient blending without any leaks or spills.
The lid should fit tightly on the blending jar, creating a seal that prevents any liquid from escaping during blending. This is particularly important when working with hot liquids or ingredients that have a tendency to splatter. The control buttons should be responsive and allow you to adjust the speed and intensity of the blending process according to your preference.
Understanding how your Hamilton Beach blender should function will help you troubleshoot any issues that may arise. By familiarizing yourself with the key components and their roles, you can easily identify the source of the problem and take the necessary steps to resolve it.
Common Issues with Hamilton Beach Blenders
Now that we understand how a Hamilton Beach blender should operate, let’s explore some of the common problems you may encounter.
Blenders have become an essential kitchen appliance, making our lives easier by effortlessly blending ingredients into smoothies, soups, and sauces. However, like any other electronic device, Hamilton Beach blenders can experience issues that hinder their performance. In this section, we will delve into some of the most common problems faced by Hamilton Beach blender users and provide helpful solutions.
Power Problems
One of the most frustrating issues is when your blender fails to power on. Imagine waking up in the morning, craving a refreshing smoothie, only to find that your blender refuses to cooperate. If you find yourself in this situation, there are a few things you can check.
First, ensure that the blender is plugged into a working outlet. Sometimes, in the rush of our daily lives, we overlook the simplest solutions. If it is, try unplugging and plugging it back in to reset the electrical connection. This simple step can often resolve minor power issues.
Additionally, check if the power cord is damaged or frayed, as this can cause power disruptions. Over time, the cord may become worn out due to regular usage or accidental tugging. In such cases, it’s important to replace the power cord to ensure safe and efficient operation.
Blade Malfunctions
Blades are at the heart of any blender, and if they’re not functioning correctly, it can impact performance. Imagine eagerly preparing a delicious salsa, only to find that the blades are not spinning as they should. If you notice the blades are not spinning or are spinning irregularly, the issue may lie with the motor.
The motor is responsible for powering the blades, and if it’s not functioning properly, it can affect the blending process. In this case, it’s advisable to reach out to a professional for repair or consider replacing the blender if it’s beyond repair. Attempting to fix the motor on your own may cause further damage and void any warranty that may be in place.
Regular maintenance and cleaning of the blades can also prevent malfunctions. Over time, food particles can accumulate and affect the blades’ performance. It’s important to disassemble the blender and clean the blades thoroughly to ensure smooth operation.
Leaking Issues
Leaking during blending can be a messy and frustrating problem. Picture yourself preparing a delicious fruit smoothie, only to find that it’s leaking all over your countertop. If you find your Hamilton Beach blender is leaking, start by checking if the lid is properly secured.
Often, the cause of leakage can be as simple as an improperly closed lid. Make sure the lid is tightly secured to prevent any liquid from escaping during blending. Sometimes, the rubber gasket on the lid may need replacing if it’s worn out or damaged. This gasket creates a tight seal between the lid and the blending jar, preventing any leaks.
Another culprit could be a crack in the blending jar itself. Over time, the jar may develop cracks due to regular usage or accidental mishandling. Assess the jar for any visible cracks and consider replacing it if necessary. Using a cracked jar can not only lead to leakage but also compromise the safety of the blender.
In conclusion, while Hamilton Beach blenders are known for their reliability and performance, they can encounter issues like any other appliance. By understanding common problems such as power issues, blade malfunctions, and leaking, you can troubleshoot and resolve these problems effectively. Remember to always prioritize safety and consult professionals when needed to ensure the longevity and optimal performance of your Hamilton Beach blender.
Step-by-Step Troubleshooting Guide
If you’re facing any of the issues mentioned above, follow this step-by-step guide to troubleshoot and rectify the problem.
Addressing Power Issues
1. Check if the blender is plugged into a working outlet.
When troubleshooting power issues with your blender, it is essential to start by ensuring that it is properly connected to a functioning power source. Sometimes, the simplest solution can be the most effective. Verify that the blender is securely plugged into a working outlet before moving on to other troubleshooting steps.
2. Ensure the power cord is not damaged or frayed.
A damaged or frayed power cord can prevent the blender from receiving the necessary electrical current. Take a close look at the power cord and check for any signs of wear and tear. If you notice any damage, it is crucial to replace the power cord to avoid any potential safety hazards.
3. Try unplugging and plugging the blender back in to reset the electrical connection.
In some cases, a simple reset can resolve power issues with the blender. Unplug the blender from the power source and wait for a few seconds. Then, plug it back in and see if the power is restored. This action can reset the electrical connection and potentially resolve minor power-related problems.
4. If the blender still doesn’t power on, consider replacing the power cord or contacting a professional for assistance.
If none of the previous steps have resolved the power issue, it may be necessary to replace the power cord. Alternatively, it is advisable to seek professional assistance from a qualified technician who can diagnose and repair the problem accurately.
Fixing Blade Problems
1. Turn off the blender and unplug it for safety.
When dealing with blade problems, it is crucial to prioritize safety. Before inspecting or attempting to fix the blades, make sure the blender is turned off and unplugged from the power source. This precautionary measure will prevent any accidental injuries.
2. Carefully remove the blending jar from the motor base.
To access the blades, you need to detach the blending jar from the motor base. Take your time and handle the jar with care to avoid any unnecessary damage or spills.
3. Inspect the blades for any obstructions or debris that may be preventing smooth rotation.
Examine the blades closely for any signs of obstruction or debris that could be hindering their rotation. Sometimes, food particles or other materials can get stuck in the blades, affecting their performance. If you notice any blockages, carefully remove them using a brush or a soft cloth.
4. Clean the blades thoroughly using warm water and mild detergent.
Regular cleaning is essential to maintain the performance and longevity of your blender blades. After removing any obstructions, wash the blades with warm water and mild detergent. Gently scrub the blades to ensure they are free from any residue or buildup.
5. If the blades are damaged or not spinning correctly, seek professional assistance or consider purchasing a replacement unit.
If you have inspected the blades thoroughly and still notice any damage or irregular spinning, it may be necessary to seek professional assistance. A qualified technician will be able to assess the problem accurately and provide the best course of action. In some cases, it might be more cost-effective to replace the entire blender unit, especially if the blades are beyond repair.
Resolving Leaking Problems
1. Ensure the lid is properly secured onto the blending jar.
When encountering leaking problems with your blender, the first step is to ensure that the lid is securely fastened onto the blending jar. Sometimes, a loose or improperly placed lid can cause leaks during operation. Double-check that the lid is correctly aligned and tightly closed before using the blender.
2. Check the rubber gasket on the lid for wear and tear; replace if necessary.
The rubber gasket on the lid plays a crucial role in preventing leaks. Over time, this gasket can wear out or become damaged, compromising its effectiveness. Inspect the rubber gasket closely and look for any signs of wear and tear. If you notice any damage, it is advisable to replace the gasket to ensure a proper seal.
3. Inspect the blending jar for any cracks or damage that may be causing leaks.
Leaks can also occur if the blending jar itself is damaged. Carefully examine the jar for any cracks or other visible signs of damage. Even a small crack can lead to leaks during blending. If you discover any damage, it is recommended to purchase a new blending jar to prevent further issues.
4. If the jar is compromised, it’s recommended to purchase a new one to prevent further issues.
If you have determined that the blending jar is compromised and causing leaks, it is best to invest in a new one. Continuing to use a damaged jar can lead to more significant problems and potentially compromise the quality of your blends. Replace the jar with a compatible and high-quality replacement to ensure optimal performance.
Preventive Measures for Blender Problems
Prevention is always better than cure, and the same applies to your Hamilton Beach blender. Taking proactive steps to maintain your blender and use it correctly can significantly reduce the occurrence of problems. Here are some preventive measures you can practice:
Regular Maintenance Tips
1. After each use, make sure to clean the blending jar, lid, and blades thoroughly.2. Avoid using harsh abrasives or scouring pads that could damage the components.3. Regularly check and replace any worn-out rubber gaskets or seals to prevent leaks.4. Store the blender in a dry and clean area when not in use to avoid dust accumulation.
Proper Usage Guidelines
1. Do not exceed the blender’s maximum capacity to avoid strain on the motor.2. Cut ingredients into small, manageable pieces before blending to ensure smooth operation.3. Avoid blending extremely hot liquids, as the heat can damage the blending jar and cause leaks.4. Use the blender on a stable and level surface to prevent accidents or damage to the motor.
When to Seek Professional Help
While troubleshooting can solve many blender issues, some problems may require professional assistance. Here are some situations where it’s best to seek the help of a trained technician:
Identifying Serious Blender Issues
1. Motor failure or excessive noise during operation that persists after troubleshooting steps.2. Cracks or significant damage to the motor base or blending jar.3. Any electrical issues beyond the power cord that require repair or replacement.4. Unexplained overheating or burning smells while using the blender.
Finding a Reliable Appliance Repair Service
To find a reliable appliance repair service for your Hamilton Beach blender, consider researching local technicians or reaching out to the manufacturer for recommendations. Be sure to read reviews and check their credentials to ensure you’re choosing a reputable and experienced professional.
Final Thoughts on Keeping Your Blender in Top Shape
Troubleshooting your Hamilton Beach blender doesn’t have to be a daunting task. With some basic understanding of how your blender functions and the steps to troubleshoot common issues, you’ll be back to blending in no time. Remember to follow the preventive measures and maintenance tips to keep your blender in excellent working condition for years to come.
FAQs (Frequently Asked Questions)
- Q: Can I blend frozen fruits in my Hamilton Beach blender?
- Q: Can I use my blender to crush ice?
- Q: How often should I replace the rubber gasket on the lid?
- Q: Can I blend hot liquids in my Hamilton Beach blender?
- Q: How long is the warranty for Hamilton Beach blenders?
- Q: How do I clean my Hamilton Beach blender?
- Q: Can I blend hot soups in my Hamilton Beach blender?
A: Yes, Hamilton Beach blenders are designed to handle frozen fruits. However, it’s essential to cut them into small pieces to prevent strain on the motor.
A: Most Hamilton Beach blenders are equipped to crush ice. Check your blender’s user manual for specific instructions and recommended ice crushing techniques.
A: It’s advisable to inspect the rubber gasket regularly for wear and tear. If you notice any signs of damage or leakage, replace the gasket promptly.
A: While Hamilton Beach blenders can handle warm liquids, avoid blending liquids that are extremely hot to prevent damage to the blending jar and potential burns.
A: The warranty length can vary depending on the model and region. Refer to your blender’s user manual or contact Hamilton Beach customer support for specific warranty information.
A: After each use, detach the blending jar, lid, and blades, and wash them thoroughly with warm water and mild detergent. Dry all components before reassembly.
A: Hamilton Beach blenders are not designed for blending hot soups. The steam and pressure from hot liquids can cause the ingredients to splatter and potentially damage the blender.
Table 1: Troubleshooting Guide
| Issue | Possible Cause | Solution |
|---|---|---|
| Power Problems | Unplugged blender or damaged power cord | Check outlet connection and replace power cord if necessary |
| Blade Malfunctions | Faulty motor or obstruction in blade assembly | Contact professional for repair or replace the blender |
| Leaking Issues | Improperly secured lid or cracked blending jar | Ensure lid is tightly sealed and replace the blending jar if damaged |
Table 2: Preventive Measures
| Tips | Description |
|---|---|
| Regular Maintenance | Clean blender components after each use and replace worn-out gaskets or seals |
| Proper Usage | Follow instructions, avoid overfilling, and cut ingredients into smaller pieces |
| Safe Storage | Store blender in a dry and clean area to prevent dust accumulation and damage |