Are you a coffee lover who dreams of creating perfectly frothed milk in the comfort of your own home? Look no further than the Bodum Milk Frother! This handy device allows you to easily froth milk for lattes, cappuccinos, and more. In this article, we will walk you through the step-by-step instructions for using a Bodum Milk Frother, from understanding the basics to troubleshooting common issues. So grab your favorite mug and let’s get started!
Understanding the Basics of a Bodum Milk Frother
Before we dive into the step-by-step instructions, it’s important to familiarize yourself with the key components of a Bodum Milk Frother. This will help you use the device effectively and ensure optimal results.
A Bodum Milk Frother is a versatile and convenient tool for creating creamy and frothy milk for your favorite hot beverages. Whether you’re a coffee enthusiast or a lover of hot chocolate, understanding the basics of this frother will enhance your at-home barista skills.
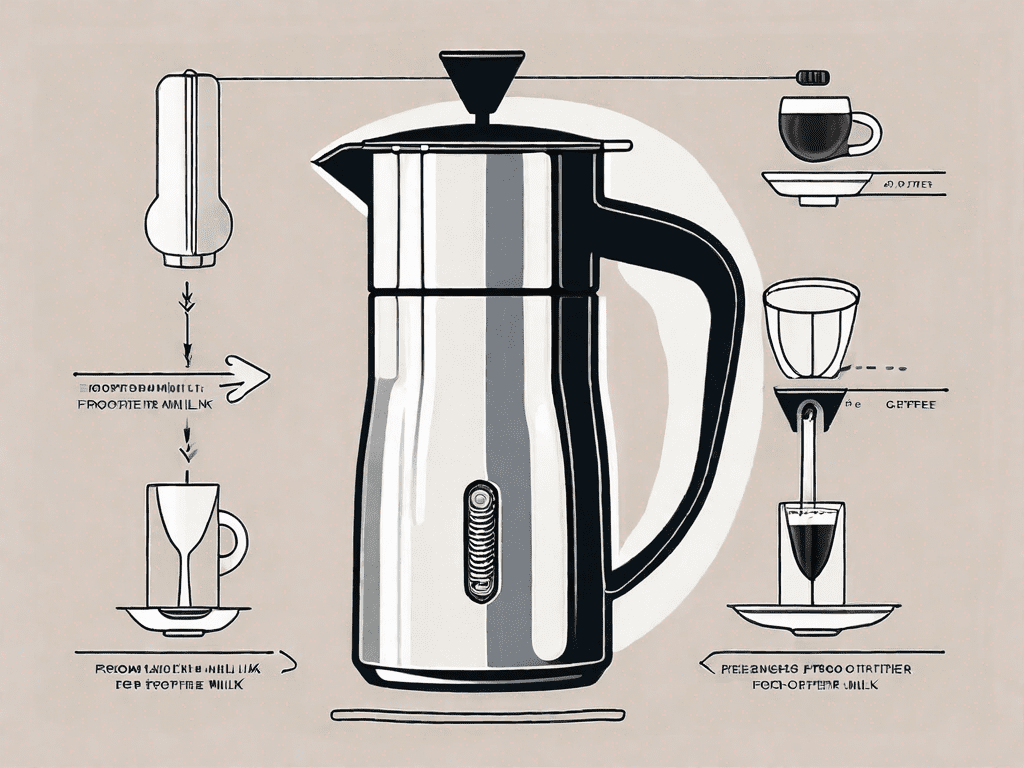
Key Components of a Bodum Milk Frother
A Bodum Milk Frother typically consists of three main parts:
- The base: This is where the motor and power switch are located. The base is designed to provide stability and support to the frother, ensuring that it stays in place while in operation. It also houses the electrical components that power the frothing process.
- The frothing wand: Also known as the whisk, this is the part that froths the milk. The wand is made of high-quality stainless steel and features a unique design that creates small bubbles and adds air to the milk, resulting in a velvety and frothy texture. It is detachable for easy cleaning and storage.
- The frothing pitcher: This is where you pour the milk and froth it. The pitcher is made of durable borosilicate glass, which is heat-resistant and allows you to monitor the frothing process. It has a comfortable handle for easy pouring and a spout that ensures precision when serving your frothed milk.
Make sure all the components are clean and dry before starting the frothing process. This will prevent any unwanted residue or moisture from affecting the quality of your frothed milk.
Safety Precautions When Using a Bodum Milk Frother
While using a Bodum Milk Frother is generally safe, it’s always important to take some precautions to avoid accidents or injuries. Here are a few safety tips to keep in mind:
- Always read the instruction manual thoroughly before using the frother. The manual provides important information about the device’s operation, maintenance, and safety guidelines.
- Ensure that the power switch is in the “off” position before plugging in the frother. This prevents any accidental activation of the frother and reduces the risk of electrical hazards.
- Never immerse the base of the frother in water or any other liquid. The base contains electrical components that can be damaged by moisture. Instead, wipe it clean with a damp cloth.
- Use caution when handling hot milk or froth to avoid burns. The frother heats the milk to a desired temperature, so it’s important to let it cool down slightly before pouring or consuming.
- Keep the frother out of reach of children. The frother is not a toy and should only be operated by adults. Store it in a safe place to prevent any accidents or misuse.
By following these safety precautions, you can ensure a safe and enjoyable frothing experience. Now that you’re familiar with the key components and safety guidelines, let’s move on to the step-by-step instructions for using your Bodum Milk Frother.
Preparing Your Bodum Milk Frother for Use
Now that you’re familiar with the basics, let’s prepare your Bodum Milk Frother for use.
Before you can start frothing milk with your Bodum Milk Frother, it’s important to ensure that it is clean and ready for use. Cleaning the frother is an essential step that should not be overlooked. By following these simple steps, you can ensure that your frother is hygienic and ready to produce perfect frothed milk.
Cleaning Your Bodum Milk Frother
Before using the frother for the first time or after a long period of storage, it’s important to clean all the components thoroughly. Here’s how:
- Detach the frothing pitcher from the base.
- Remove the frothing wand from the pitcher.
- Wash all the components with warm soapy water.
- Rinse them thoroughly and dry with a clean towel.
When cleaning the components, pay special attention to any milk residue that may have accumulated. Use a gentle scrub brush or sponge to ensure that all surfaces are thoroughly cleaned. Rinse the components under running water to remove any soap residue. Finally, dry the components with a clean towel to prevent any water spots or streaks.
Ensure that there are no residue or soap remnants left on any of the parts before assembling them back together. This will ensure that your frother operates at its best and that your milk remains free from any unwanted flavors or odors.
Assembling Your Bodum Milk Frother
Once the components are clean and dry, it’s time to assemble your Bodum Milk Frother. Here’s how:
- Place the frothing pitcher back onto the base.
- Insert the frothing wand into the pitcher.
- Ensure that the wand is securely in place.
When assembling the frother, make sure that all the components fit together snugly. This will prevent any leaks or spills during the frothing process. Double-check that the frothing wand is securely inserted into the pitcher to ensure proper functionality.
Your Bodum Milk Frother is now ready to be used for frothing milk. With a clean and well-assembled frother, you can now enjoy the perfect cup of frothy goodness in the comfort of your own home.
The Frothing Process: A Step-by-Step Guide
Now that your frother is assembled, it’s time to start frothing your milk. Follow these step-by-step instructions for a deliciously frothy result.
Choosing the Right Type of Milk
The type of milk you choose can greatly impact the frothing process and the quality of the froth. For best results, use fresh cold milk with a higher fat content, such as whole milk or 2% milk. Non-dairy milk alternatives like soy, almond, or oat milk can also be frothed, but the results may vary.
When selecting your milk, it’s important to consider the flavor and texture you desire in your froth. Whole milk, with its rich and creamy consistency, is often preferred by coffee enthusiasts for its ability to create a velvety froth. On the other hand, 2% milk offers a slightly lighter froth with a touch of sweetness.
If you prefer a non-dairy option, almond milk can provide a delicate and nutty undertone to your froth, while soy milk offers a smooth and creamy texture. Oat milk, known for its natural sweetness, can also produce a froth that complements a variety of beverages.
Heating the Milk
To achieve the perfect froth, start by heating the milk. Here’s how:
- Pour the desired amount of milk into the frothing pitcher.
- Attach the frothing pitcher to the base of the frother.
- Ensure that the lid is securely closed.
- Plug in the frother and turn it on.
- Wait for the milk to heat up to your desired temperature. This usually takes a few minutes.
As the milk heats up, you may notice a gentle steam rising from the frothing pitcher. This is a sign that the milk is gradually reaching the optimal temperature for frothing. It’s important to monitor the temperature closely to prevent overheating, as this can affect the quality of the froth.
Pro tip: Avoid overheating the milk, as it can affect the quality of the froth. A temperature between 140°F to 160°F (60°C to 71°C) is generally ideal for frothing.
Frothing the Milk
Once the milk is heated to the desired temperature, it’s time to start frothing.
- Lower the frothing wand into the milk, ensuring that it is immersed but not touching the bottom of the pitcher.
- Turn on the frother and let it run for about 15-30 seconds or until the milk has reached your desired frothiness.
- Move the frothing wand up and down in a gentle swirling motion to incorporate more air into the milk.
- Remove the frothing wand from the milk and turn off the frother.
During the frothing process, the frother’s powerful motor creates a vortex within the milk, introducing air and creating tiny bubbles that give the froth its light and airy texture. The longer you froth, the more air is incorporated, resulting in a thicker and more voluminous froth.
As you move the frothing wand in a swirling motion, you are effectively distributing the froth evenly throughout the milk, ensuring a consistent texture. This technique also helps to stabilize the froth, preventing it from collapsing too quickly.
Congratulations! You’ve successfully frothed your milk using a Bodum Milk Frother. Pour the frothed milk into your favorite mug and enjoy!
Tips for Achieving the Perfect Froth
Frothing milk can be a bit tricky at first, but with these tips, you’ll be able to achieve the perfect froth every time.
Temperature Tips for Optimal Froth
As mentioned earlier, the temperature of the milk plays a crucial role in achieving optimal froth. Here are some temperature tips to keep in mind:
- Use cold milk straight out of the refrigerator for the best results.
- Avoid overheating the milk, as it can result in larger bubbles and less creamy froth.
- Experiment with different temperature ranges to find your personal preference.
Frothing Techniques for Different Types of Milk
Not all types of milk froth the same way. Here are a few techniques for frothing different types of milk:
- Whole milk: Whole milk tends to produce creamy and rich froth easily. Follow the general frothing instructions mentioned earlier.
- Non-dairy milk alternatives: Non-dairy milk alternatives may require a bit more practice to achieve the desired froth. Experiment with different brands and types to find the one that froths well.
Remember, practice makes perfect, so don’t be discouraged if your first attempts don’t turn out as expected. With time and practice, you’ll become a frothing pro!
Troubleshooting Common Issues with Bodum Milk Frothers
Encountering issues with your Bodum Milk Frother? Don’t worry; we’ve got you covered. Here are some common problems and their solutions:
Frother Not Producing Enough Froth
If your frother is not producing enough froth, try the following:
- Ensure that you are using cold milk, as warm or hot milk may not froth properly.
- Check that the frothing wand is securely attached to the pitcher.
- Make sure the pitcher is clean and free from residual milk or dirt that may hinder frothing.
- Try using a different type or brand of milk, as some milk froths better than others.
Frother Overheating or Not Heating
If your frother is overheating or not heating at all, try the following:
- Check that the power switch is in the correct position and the frother is properly plugged in.
- Ensure that the base is clean and free from any debris that may obstruct the heating element.
- If the problem persists, contact customer support for assistance.
Remember to always refer to the instruction manual provided with your Bodum Milk Frother for specific troubleshooting tips and guidance.
Maintaining Your Bodum Milk Frother
To keep your Bodum Milk Frother in optimal condition and ensure its longevity, regular cleaning and proper maintenance are essential.
Regular Cleaning and Care
Here are a few tips for cleaning and caring for your frother:
- After each use, detach the frothing pitcher and clean it with warm soapy water.
- Rinse thoroughly and dry with a clean towel.
- Wipe the base of the frother with a damp cloth to remove any spills or splatters.
- Avoid submerging the frother in water or using abrasive cleaning materials.
Following these cleaning practices will help prevent any buildup or residue that may affect the performance of your frother.
Storing Your Bodum Milk Frother Properly
If you plan to store your Bodum Milk Frother when not in use, here are some tips to keep in mind:
- Ensure that all the components are completely dry before storing to prevent mold or mildew growth.
- Store the frother and its components in a clean and dry place, away from direct sunlight.
- If possible, store the frother in its original packaging to provide additional protection.
By following these storage practices, you’ll ensure that your frother is ready for use whenever you need it.
FAQs (Frequently Asked Questions)
Q: Can I froth hot milk with a Bodum Milk Frother?
A: No, a Bodum Milk Frother is designed to froth cold milk. Frothing hot milk can be dangerous and may damage the frother.
Q: Can I froth non-dairy milk alternatives with a Bodum Milk Frother?
A: Yes, you can froth non-dairy milk alternatives like soy, almond, or oat milk with a Bodum Milk Frother. However, the results may vary depending on the type and brand of milk.
Q: How long does it take to froth milk with a Bodum Milk Frother?
A: Frothing time can vary depending on the desired frothiness and the type of milk being used. On average, it takes about 15-30 seconds to froth milk using a Bodum Milk Frother.
Q: Can I use the frother without the frothing wand?
A: No, the frother requires the frothing wand to create the desired froth. The frothing wand incorporates air into the milk, creating the frothy texture.
Q: Can I use a Bodum Milk Frother for other purposes besides frothing milk?
A: While a Bodum Milk Frother is primarily designed for frothing milk, you can also use it for mixing hot chocolate powder, creating milkshakes, or even mixing protein shakes.
Q: Is it necessary to lubricate the frothing wand or other parts of the frother?
A: No, it is not necessary to lubricate any parts of the frother. Lubrication may cause damage to the device or may affect the taste and quality of the froth.
Q: Can I use the frother on an induction cooktop?
A: No, a Bodum Milk Frother is not suitable for use on an induction cooktop. It is designed to be used as a standalone appliance.
Table 1: Comparison of Different Milk Types for Frothing
| Type of Milk | Frothability | Taste |
|---|---|---|
| Whole Milk | Excellent | Creamy and Rich |
| 2% Milk | Good | Light and Creamy |
| Non-Dairy Milk (Almond) | Fair | Nutty |
| Non-Dairy Milk (Soy) | Fair | Creamy |
| Non-Dairy Milk (Oat) | Poor | Slightly Sweet |
Table 2: Troubleshooting Guide
| Issue | Possible Cause | Solution |
|---|---|---|
| Frother Not Producing Enough Froth | Improper milk type or temperature | Use cold milk and experiment with different types or brands |
| Frother Overheating or Not Heating | Power switch or base issue | Check power switch and base for any problems, contact customer support if necessary |
Now that you have a complete guide to using a Bodum Milk Frother, you can enjoy cafe-quality frothed milk right at home. Whether you’re making a latte, cappuccino, or a hot chocolate, the Bodum Milk Frother will elevate your beverage to the next level. So go ahead and indulge in your favorite frothy creations!