If you’re looking for a quick and easy snack, or a convenient option for meal prep, microwave uncrustables might just be the answer. This article will cover everything you need to know about the history of uncrustables, how to make them at home, the benefits of making your own, nutritional value, and creative filling ideas.
The History of Uncrustables
Uncrustables were first introduced by Smucker’s in the late 1990s, as a convenient lunchbox option for kids. These pre-made sandwiches eliminated the need for time-consuming sandwich assembly or messy crust-cutting. Today, uncrustables are available in various flavors and sizes, and have become a popular snack for all ages.
Interestingly, the idea for uncrustables came from a Smucker’s employee who was packing her own children’s lunches and noticed that they never ate the crusts. She brought the idea to the company, and after some experimentation, uncrustables were born. The sandwiches were an instant hit and have since become a staple in many households and schools.
How to Make Microwave Uncrustables at Home
You can easily make your own microwave uncrustable at home with just a few ingredients. Start by placing a slice of bread on a flat surface, and adding your desired filling. Next, place another slice of bread on top, and use a circular cookie cutter to remove the crust. Finally, use a fork to crimp the edges of the sandwich together. Wrap the uncrustable in plastic wrap, and freeze until ready to use.
One of the benefits of making your own microwave uncrustables is that you can customize the filling to your liking. You can use peanut butter and jelly, ham and cheese, or even Nutella and banana. The possibilities are endless, and you can experiment with different combinations until you find your favorite.
Another advantage of making your own uncrustables is that they are a great option for meal prep. You can make a batch of them on the weekend, and have them ready to go for the week ahead. They are perfect for packing in a lunchbox, or for a quick and easy snack on the go.
A Step-by-Step Guide to Making the Perfect Microwave Uncrustable
While making a microwave uncrustable is simple, there are a few tips and tricks that can take your snack to the next level. First, use a thin layer of peanut butter or spread on each slice of bread before adding the filling. This will help seal the bread together and prevent leakage. When cutting the crust off, make sure to press down firmly but carefully to avoid squishing the filling. Finally, make sure to seal the edges well to prevent the filling from leaking out during microwaving.
Another tip to consider is to use a fork to press down the edges of the uncrustable after sealing it. This will create a decorative pattern and ensure that the edges are tightly sealed. Additionally, you can experiment with different fillings to create a variety of flavors. Some popular options include jelly, Nutella, honey, and sliced fruit.
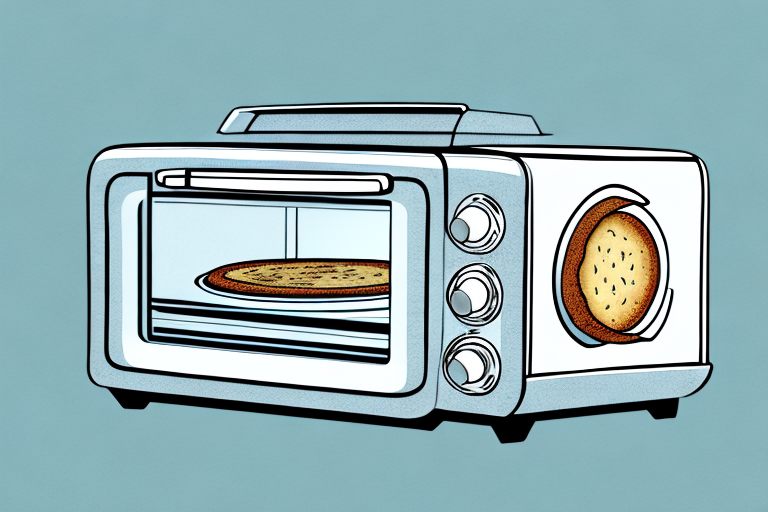
It’s also important to note that microwaving times may vary depending on the wattage of your microwave. Start with 15-20 seconds and then check the uncrustable. If it’s not warm enough, continue microwaving in 5-second intervals until it reaches your desired temperature. Be careful not to overheat it, as this can cause the filling to burst out of the bread.
The Benefits of Making Your Own Microwave Uncrustables
Aside from being a tasty snack, making your own microwave uncrustables has several benefits. Firstly, it allows you to customize your fillings to your liking, whether it be sweet or savory. It’s also a great way to save money, as pre-made uncrustables can be expensive. Finally, preparing your own snacks is a great way to be mindful of what ingredients are going into your food.
In addition to these benefits, making your own microwave uncrustables can also be a fun activity to do with kids. They can help choose the fillings and assist in assembling the sandwiches. It’s a great way to spend quality time together while also teaching them valuable cooking skills. Plus, they’ll be more likely to eat and enjoy the snacks they helped make!
Comparing Store-Bought vs Homemade Microwave Uncrustables
While store-bought uncrustables are convenient, they often contain preservatives and additives that homemade versions do not. Making your own also allows for more control over the ingredients used, and can often be a more cost-effective solution in the long run.
Additionally, homemade uncrustables can be customized to fit individual preferences and dietary restrictions. For example, those with gluten sensitivities can use gluten-free bread, and those who prefer organic ingredients can choose to use only organic products. This level of customization is not possible with store-bought options.
How to Store and Freeze Microwave Uncrustables for Easy Meal Prep
If you’re interested in making microwave uncrustables for meal prep, storing and freezing them properly is important. Simply wrap each sandwich tightly in plastic wrap, and place them in an airtight container or freezer bag. They can be stored in the freezer for up to two months, and can easily be microwaved for a quick and convenient snack or lunch option.
It’s important to note that when freezing uncrustables, you should avoid overstuffing them with ingredients. This can cause the sandwich to expand and potentially burst during the freezing process. Additionally, it’s recommended to use a high-quality bread that won’t become soggy or lose its texture when thawed and microwaved.
Another tip for easy meal prep is to make a large batch of uncrustables at once and freeze them in individual portions. This way, you can simply grab one from the freezer and microwave it whenever you need a quick and easy meal or snack. It’s a great option for busy mornings or when you don’t have time to prepare a full meal.
10 Delicious and Creative Fillings for Your Microwave Uncrustable
If you’re bored of the traditional peanut butter and jelly filling, try switching it up with these creative options:
- Crunchy nutella and banana
- Tuna salad with diced celery and onions
- Chicken, bacon, and ranch
- Ham and cheese
- Pesto and tomato
- Cream cheese and jelly
- Avocado and egg
- Buffalo chicken and blue cheese
- Broccoli and cheddar
- Roast beef and horseradish
Another great filling option is hummus and roasted vegetables. Simply spread a layer of hummus on one side of the uncrustable and add your favorite roasted veggies, such as bell peppers, zucchini, and eggplant.
If you’re looking for a sweet and savory combination, try filling your uncrustable with sliced apples, cheddar cheese, and honey mustard. The sweetness of the apples pairs perfectly with the tanginess of the cheese and the honey mustard adds a nice kick.
The Nutritional Value of Microwave Uncrustables
The nutritional value of microwave uncrustables can vary based on the filling and bread used. However, it is generally a good source of carbohydrates and protein. It is important to be mindful of added sugars or high-fat fillings, and to choose whole grain breads for added fiber.
Additionally, microwave uncrustables can be a convenient option for those with busy schedules or limited access to kitchen facilities. They can be easily stored in a freezer and quickly heated up in a microwave, making them a quick and easy meal or snack option.
However, it is important to note that microwave uncrustables should not be relied on as a sole source of nutrition. It is still important to incorporate a variety of fruits, vegetables, and other whole foods into your diet for optimal health.
Quick and Easy Snack Ideas Using Microwave Uncrustables
Aside from being a stand-alone snack or lunch option, microwave uncrustables can be incorporated into other snacks and meals. Try using them as a base for mini pizzas, or use them to make French toast by dipping slices in egg and milk before cooking in a pan.
Another great way to use microwave uncrustables is to turn them into a delicious dessert. Simply cut them into small pieces and mix them with whipped cream and your favorite fruits to make a quick and easy trifle. You can also use them as a base for a bread pudding by soaking them in a mixture of milk, eggs, and sugar before baking in the oven.
If you’re looking for a savory snack, try making a grilled cheese sandwich using microwave uncrustables. Simply add your favorite cheese between two uncrustables and cook in a pan until the cheese is melted and the bread is crispy. You can also use them as a base for a breakfast sandwich by adding scrambled eggs and bacon or sausage.
Kid-Friendly Lunchbox Ideas with Microwave Uncrustables
Microwave uncrustables make an easy addition to any lunchbox. Try adding a variety of fruits and veggies, and pair with a yogurt or string cheese for added protein. For a sweet treat, add a small handful of chocolate chips or trail mix.
Another great way to use microwave uncrustables in your child’s lunchbox is to make a fun sandwich kabob. Cut the uncrustable into bite-sized pieces and alternate with cherry tomatoes, cucumber slices, and cubes of cheese on a skewer. This is a fun and interactive way for kids to enjoy their lunch and get some extra veggies in their diet.
Gluten-Free and Dairy-Free Options for Making Microwave Uncrustables
To make gluten-free microwave uncrustables, use gluten-free bread or tortillas instead. For dairy-free options, try using hummus or avocado as a spread instead of cheese or cream cheese.
Another option for making gluten-free microwave uncrustables is to use lettuce leaves or collard greens as a wrap instead of bread or tortillas. This is a great option for those who are looking for a low-carb or grain-free alternative.
If you’re looking for a sweet option, try using almond butter or sunflower seed butter instead of peanut butter. These nut butters are naturally gluten-free and dairy-free, and they add a delicious flavor to your uncrustables.
How to Make Vegan-Friendly Microwave Uncrustables
Vegan microwave uncrustables can be made by using plant-based bread, and filling with options such as peanut butter and jelly, hummus and veggies, or tofu and avocado.
To make the perfect vegan microwave uncrustables, start by selecting your favorite plant-based bread. Look for bread that is free from animal products such as eggs, milk, and honey. Whole wheat or multigrain bread is a great option for added nutrition.
Next, choose your filling. Peanut butter and jelly is a classic option, but you can also get creative with hummus and veggies, tofu and avocado, or even vegan cream cheese and fruit. Spread your filling onto one slice of bread, leaving a small border around the edges.
Once your filling is in place, top with the other slice of bread and use a fork to press the edges together, creating a seal. Place your uncrustable in the microwave and heat for 20-30 seconds, or until the filling is warm and the bread is slightly toasted. Enjoy your delicious and easy vegan snack!
The Perfect Pairings: What to Serve with Your Microwave Uncrustable
Microwave uncrustables can be paired with a variety of sides to make a more complete meal. Try pairing with carrot sticks and ranch dressing, whole grain pretzels, or a small side salad.
For a heartier meal, consider pairing your microwave uncrustable with a cup of soup or a serving of mac and cheese. These warm and comforting sides will complement the sandwich perfectly, especially on a chilly day. Alternatively, if you’re looking for a sweet treat to go with your uncrustable, try pairing it with a small fruit cup or a handful of grapes. The sweetness of the fruit will balance out the savory flavors of the sandwich, creating a delicious and satisfying meal.
Tips and Tricks for Perfecting Your Microwave Uncrustable-Making Skills
Here are a few additional tips to help you perfect your uncrustable-making skills:
- Use a sturdy bread to prevent it from breaking or becoming soggy
- Less is more when it comes to filling – too much can cause leakage
- Press down the fork firmly and evenly around the edges to ensure a good seal
- Defrost the uncrustable for a few seconds before microwaving to ensure even heating
With these tips, tricks, and creative filling ideas, you’re sure to become a microwave uncrustable-making pro. Whether you’re looking for a quick snack or an easy lunchbox option, microwave uncrustables are a convenient and tasty solution.
Another important tip to keep in mind is to make sure that the filling is evenly distributed throughout the uncrustable. This will ensure that every bite is just as delicious as the last. Additionally, you can experiment with different types of bread and fillings to create unique and exciting flavor combinations.
It’s also important to note that uncrustables can be stored in the freezer for up to three months, making them a great option for meal prep or for busy days when you don’t have time to make lunch from scratch. Simply take them out of the freezer and microwave for a quick and easy meal on-the-go.