Bread dough is one of the most simple, delicious, and easy-to-make recipes you can make at home. You may ask yourself how to mix and knead bread dough like a pro, but we’re here to tell you that it’s actually quite simple! If you don’t have time or patience to spare for hours in the kitchen mixing and kneading bread dough when there are so many other dishes that require your attention, worry not — this quick article will show you how to get around your “skills” issue.
Quickly Mix Your Dough In Your Stand Mixer
First, if you have a stand mixer, use it. The dough hook will make mixing the dough a cinch. If you don’t have one of these handy devices on hand, you can use a regular spoon to mix the dough in a large bowl and then grab yourself an electric hand mixer once your dough is mixed together well enough. We usually use the paddle attachment on our stand mixer for mixing bread dough because it tends to be much better at this task than the hand-held beater sticks.
If you don’t have a stand mixer, use the paddle attachment on your electric hand mixer or use a large bowl and spoon to mix together your dough. For hand mixers and large bowls and spoons, we typically add in the milk and oil and whisk it all together well before adding the flour gradually so that the dough sticks to itself.
Don’t Mix The Water In Too Quickly
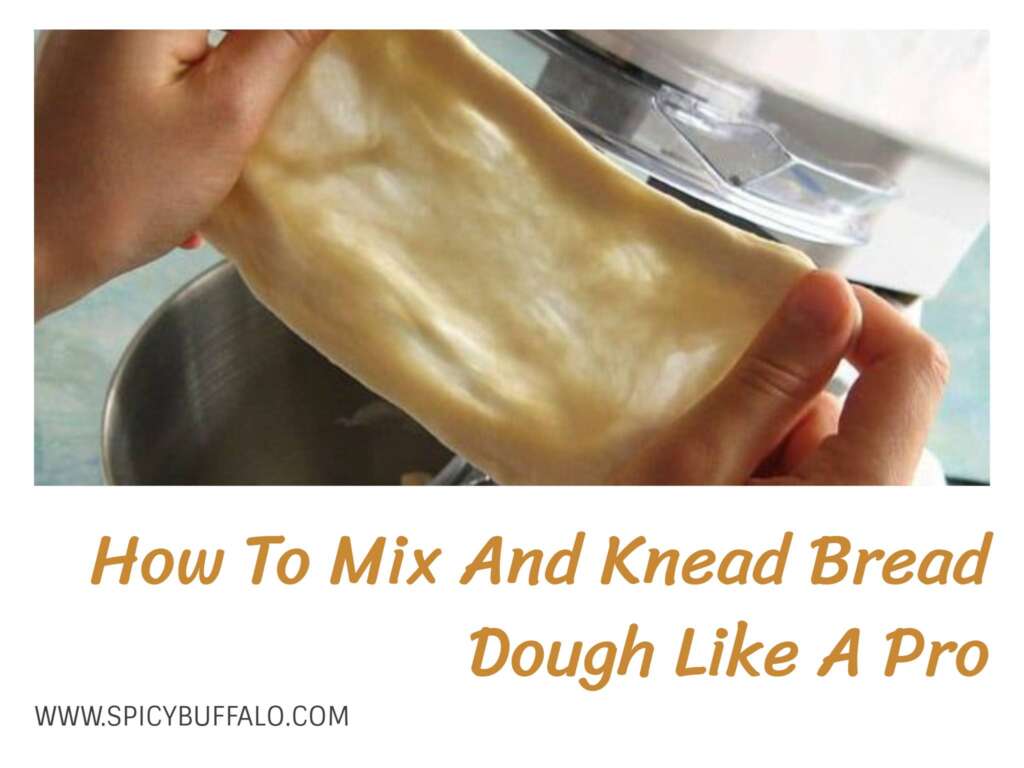
You’ll notice as you are mixing your dough that it will quickly absorb all of the liquid without actually forming any kind of ball or even a loose dough at all. That’s because the flour you are using is super absorbent. Don’t panic. Just keep mixing until the dough pulls away from the side of your bowl and is thick and pretty much fully hydrated.
This should take a few minutes, maybe 10 to 20.
At this point, you can turn the dough out onto your countertop. We find this to be easier than trying to transfer it directly into a greased bowl, but the exact method is up to you. Flour serves its purpose for this next step because it will prevent sticking and help your dough develop a nice sheen before being rolled out or folded over with your other ingredients.
Shape Your Dough
The shape of your dough doesn’t really matter when it comes down to it — just work with what you’ve got. We usually shape it into a long strip and then divide it in half. You can also simply shape it into whatever form you want — just make sure that the dough is formed as loosely as possible. Like I mentioned before, the less air the better when it comes to bread dough, so you’ll want to flatten and even out your dough as much as possible with your hands, rolling pin or whatever (we’re big on rolling pins here).
Once you’ve got your dough ball into a nice-looking long piece of bread dough, it’s time to start shaping your loaf. How have we managed so far without mentioning getting out your bread pan? Slow down there, gang! We’re getting there.
Roll Out And Fold
Using a rolling pin, place your dough over your work surface and roll it under itself using the side of your rolling pin to guide it into a circle. You should have a nice large circle that looks like the bottom of your loaf pan.
You can then fold this piece of dough into itself by taking the edge and folding it over the middle, leaving you with two roughly equal pieces with some neat creases in them. It’s okay if the fold is messy — it’s supposed to look like that.
If your dough is kneaded properly, it should be quite easy to work with and should allow you to get a nice neat fold each time. Be sure that the two pieces of dough are quite equal and that there aren’t any large creases in them (especially at the edges). Some people like to pull the two pieces of dough apart after they’ve been folded and then take a ruler or bread knife and slice them apart into two smaller balls of dough — this lets you get an even division in your loaf while also giving more shape to your loaves. Our loaf pans don’t have a divider and we’re fine with that! If you do this, just be sure to flour your work surface or it will stick to you.
Shape The Loaf
You now have two round pieces of dough that resemble the bottom of your loaf pan and are about equal to each other. You can either pick them up and place them back down into the dough for shaping, or roll them out onto your greased countertop and shape them how you want. The choice is yours, but one thing is certain — you end up with two nice round pieces of bread after shaping these little balls of dough. Again, if your dough has been properly kneaded, this part should be quite easy.
Get Them Into The Oven
We generally bake our loaves first on the middle rack in a preheated oven at 425 degrees F for 30 minutes or so. If we’d like a crunchier crust, we’ll bake it for longer. We generally bake two loaves at once and then simply swap them out onto the bottom rack of the oven.
If you have a convection setting on your oven, use it! It will help to cook your bread more evenly by circulating all of the hot air throughout your cooking environment, but this is only really important if you are cooking multiple loaves at once.
If at this point your bread doesn’t look done, but is actually ready to come out of the oven, make sure that it’s not stuck to the side of your pan by giving it a couple knocks with a wooden spoon. If it’s really not ready, give it a few more minutes.
If you don’t have an automatic thermometer for your oven, you can use an internal thermometer for baked goods and get yourself one right away if you don’t already have one. These are handy little gadgets that let you know when your loaves are ready to come out of the oven. Just stick one into the center of your bread when it comes out of the oven and pull it out to see if it’s ready. Your bread might take longer than 30 minutes, but that’s okay. If you’ve followed the recipe carefully, you’ll know when your bread is done!
If you baked two loaves at once, be sure to let them cool completely before slicing into them. We find that if we fill our loaf pans too full that our loaves will collapse on top of themselves after they come out of the oven, but that’s okay since a good loaf always rises! Just be careful as you try to slice off a nice thick piece — this tends to happen without fail after cooling.
Your bread is ready to eat now, but you might want to let it sit for an hour or two before you dig in so that the flavors can mingle!
Bread Tip
In tough economic times, many people are looking for ways to save money on their grocery bills without having to sacrifice too much quality. Bread baking is an excellent way to save money — not only are your end results cheaper than store-bought loaves, but it’s also possible to bake a lot of loaves with a single batch of dough. In this case, you’ll want to get as much out of your first batch as possible.
Once you have the process down, you’ll be able to make incredible bread at home. It’s a lot of fun and surprisingly easy. Not only that, but baking your own bread is a great way to gain more knowledge about how food is made and to learn about your own body’s natural processes for converting all of that healthy grain into something that is delicious! We’ve been baking our loaves for years now and we can’t imagine ever buying store-bought bread again — it’s just not worth it.
Is machine kneading better than hand kneading?
If you’ve been following along through the recipes, you’ll know that we recommend hand kneading as a great way to develop strength in your forearms and back. It’s a great exercise, but it’s not for everyone. There are also some machines that can handle this task for you, and if you have access to one of them, we suggest using it. Even though hand kneading is incredibly effective, it can also be quite hard on your wrists and arms — particularly if you’re trying to manage a full-time job or do other activities while completing this task.
Can I knead dough by hand instead of a mixer?
If you have a mixer that’s in good condition, you can use it instead of hand kneading. You might actually be surprised at how easy it is to knead dough with a mixer. Just set your mixing attachment to the highest speed, put the dough hook on top of your dough ball and let it do its thing!
Make sure that the dough hook is going all the way down into the bottom of your mixing bowl so that it doesn’t get all wound up in the bottom of your bowl while you’re mixing. If you place your mixing bowl over a kitchen towel before starting this process, then there’s a good chance that whatever happens will be contained within the towel, making cleanup much easier.
Is a dough hook the same as kneading?
Even though you might use a dough hook while you’re using the mixer, this is not the same thing as kneading with your hands. A dough hook simply helps mix your ingredients and knead the flour into your dough. It doesn’t give you the opportunity to work in a nice rhythm like hand kneading does.
Is it better to under kneaded or over knead bread dough?
This is an incredibly common question that people ask. There’s no right or wrong answer to this one, but here’s what we know:
If you under knead your dough, you’ll end up with a tough dough that won’t rise as well and that has a flatter shape than it would have otherwise. This is actually the opposite of what most people want. Most of us like our bread loaves to be soft and light, regardless of how long they are made because they lose their shape when they’re baked and become more like pita as they rise through the oven. Our bodies need a bit more structure than that if we want to stay healthy.
People who over knead their dough will end up with a dough that’s stiff and dry. This is also not what most people want. Most of us want our bread to be soft, moist, and light — not something that’s really tough but that’s just too moist to be eaten. Our bodies need a bit more moisture than that if we want to stay healthy.
What do you recommend?
In our experience, we’ve found that under kneading your dough is better than over kneading it by as much as 1/2 cup of flour. This is because the more water you add, the softer your loaf will be and the easier it is for your body to digest it properly. However, if you add too much flour, it will become dense and stiff — not what many of us are looking for. Try to find the balance that’s right for you — there’s no wrong way to do this, just some ways that work better than others.
CONCLUSION:
In the end, these are just a few of the many reasons why homemade bread is so much better than store-bought bread. We hope that you’ve found some of this information useful and that you’re able to take it with you when you’re learning how to make your own loaf of healthy, delicious bread!
