Key Takeaway:
- Advantages of cooking pop tarts in an oven: Pop tarts cooked in an oven are crispier and have a better texture than those cooked in a microwave. Ovens also allow for a more even distribution of heat, ensuring that the filling is warm and not too hot.
- Step-by-step guide to cooking pop tarts in an oven: Preheat the oven to 350°F, place the pop tarts on a baking sheet and bake for 12-15 minutes. Let the pop tarts cool for a few minutes before serving.
- Tips for baking pop tarts in a toaster oven: To prevent burning, keep an eye on the pop tarts as they cook in the toaster oven and rotate the baking sheet halfway through cooking. It is also important to use the right temperature and avoid overcrowding the baking sheet.
Crave freshly-baked desserts? No stress! This recipe will have homemade Pop Tarts in the oven in no time. Enjoy the yummy, sweet, and crunchy goodness of your own freshly-baked Pop Tarts. No hassle!
Introduction
The article discusses the process of cooking pop tarts in an oven. It covers topics such as preheating the oven, the proper temperature and baking time, and the ideal texture of the pastry. It also tackles issues like using foil or paper plates in the oven and the safety of leaving an oven on while not at home. Lastly, it suggests ways to reheat leftover pop tarts, with a cautionary note on how to remove burnt sugar from the oven.
A brief history of the pop tart is also shared in the article.
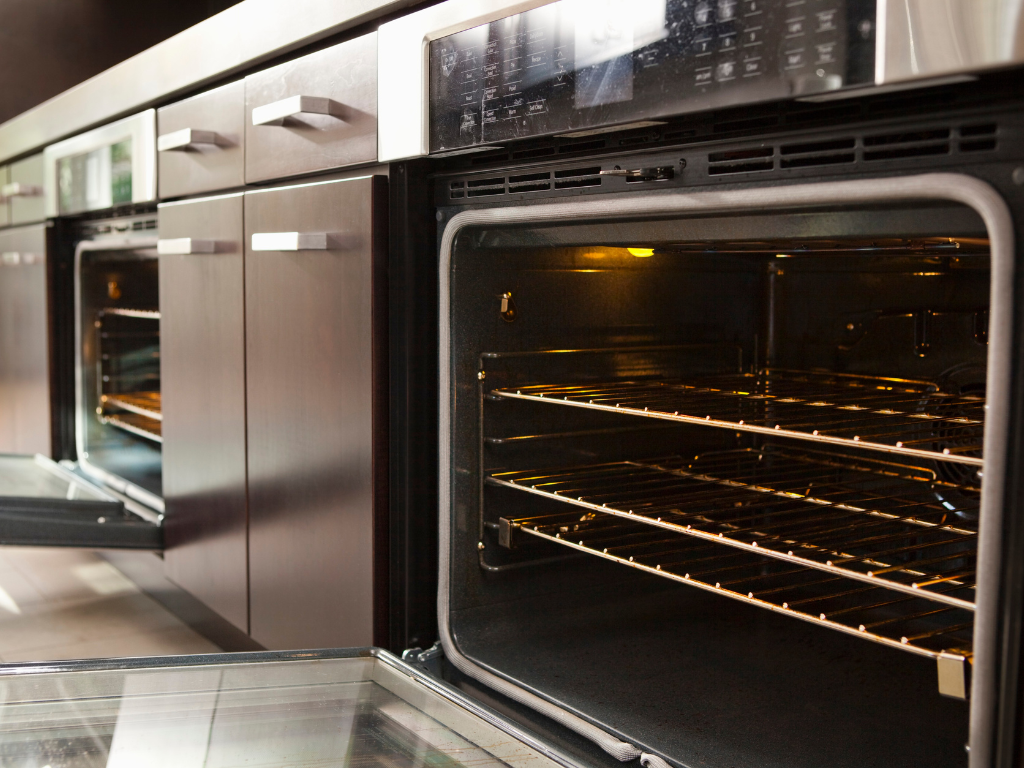
Cooking Pop Tarts in an Oven
Pop Tarts are a delicious and convenient breakfast pastry that can be enjoyed by anyone for a quick and tasty morning meal. If you prefer to cook them in an oven, here is a simple three-step guide.
- First, preheat the oven and line a baking sheet with parchment paper.
- Second, place the Pop Tarts on the baking sheet and bake for 8-10 minutes or until golden brown.
- Finally, remove the Pop Tarts from the oven and let them cool for a few minutes before enjoying.
It’s important to note that you should avoid using paper plates in the oven, as they can easily catch fire. If you’re concerned about oven safety, be sure to follow guidelines for preventing sparks or fires.
For those looking for a homemade version of Pop Tarts, consider using pie dough and filling the pastries with your favorite flavors. Additionally, topping them with frosting will give you that extra sweet touch.
Remember to always take care when cooking, and enjoy your delicious Pop Tarts!
Advantages of cooking pop tarts in an oven
Cooking Pop Tarts in an Oven allows for a unique and tasty experience with a crispy texture and flaky crust. Here are some advantages:
- Size: An oven is typically larger than a toaster oven, making it easier to cook multiple Pop Tarts at once.
- Crispy Texture: Cooking Pop Tarts in an Oven allows for a crispier texture compared to using a microwave or toaster oven.
- No Need to Flip: Unlike cooking on a stove, you won’t have to flip the Pop Tarts when cooking them in an Oven.
- You Can Use Paper Plates: Yes, it’s perfectly safe to use paper plates when baking Pop Tarts in the oven. Just don’t leave them in there too long!
- Avoid Sparks: If your toaster oven’s heating element is sparking or producing smoke, using an Oven can be a safer option.
It’s important to note that when baking Pop Tarts in an Oven, you should avoid ordinal adverbs like “lastly” or “finally” and never put plastic items like packaging in the oven.
Don’t miss out on this delicious and easy-to-make breakfast treat! Convert any moreish nibble craving into delightfully toasted warm bits of pastry using the oven today!
Step-by-step guide to cooking pop tarts in an oven
If you’re looking for a way to cook pop tarts in an oven, we’ve got you covered. Follow these three easy steps:
- Preheat your oven to 375°F
- Place the pop tarts on a baking sheet lined with parchment paper.
- Bake the pop tarts for 10-12 minutes until they’re golden brown.
When it comes to cooking pop tarts in an oven, it’s essential not to leave the paper packaging on while baking them as doing so could create a fire hazard. Additionally, always make sure not to overcook or undercook your pop tarts; therefore, setting a timer is very crucial.
Pro Tip: For best results, let the cooked Pop Tarts cool down before eating them.
Tips for baking pop tarts in a toaster oven
When it comes to baking pop tarts in a toaster oven, there are a few tips and tricks that can come in handy. By following these steps, you can ensure that your pop tarts turn out crispy and delicious.
- Preheat your toaster oven to 375°F.
- Place your pop tarts on a baking sheet or directly on the wire rack inside the toaster oven.
- Bake for 8-10 minutes or until golden brown.
- Remove from the toaster oven and allow them to cool before enjoying.
One thing to note is that using paper plates in the oven is not recommended as they may catch fire. Similarly, if your oven element is sparking, it’s important to have it serviced immediately by a professional technician.
A true story worth mentioning is about a friend who decided to put plastic containers in the oven while cooking. This caused their containers to melt and emit toxic fumes into their home. Always double-check that any item you’re considering putting in the oven is safe for use at high temperatures.
Homemade Pop Tarts
Homemade Pop Tarts are delicious pastries that can be made at home with ease. These delectable treats are a perfect breakfast or snack item that can be customized as per one’s liking and taste.
Here’s a 6-step guide to making Homemade Pop Tarts:
- Preheat the oven to 375°F.
- Roll out the pie crusts into rectangles and cut them into equal-sized pieces.
- Spread the filling of your choice on half of the rectangles.
- Place another rectangle on top of the filling-covered ones and use a fork to crimp the edges together.
- Bake the pop tarts in the preheated oven for 15-20 minutes or until they turn golden brown.
- Remove them from the oven, let them cool and then add the glaze of your choice.
For a unique twist, try adding different flavors of fillings, frostings, and toppings to your Homemade Pop Tarts. You can experiment with various combinations of fruits, jams, and chocolates to make them even more flavorful.
Don’t miss out on the experience of making and tasting your very own Homemade Pop Tarts. Start baking now and enjoy the goodness of these delicious treats. Share your creations with your friends and family and let them savor the flavors of your creativity.
Ingredients needed to make homemade pop tarts
Making your own pop tarts is easy and delicious. Here’s what you’ll need:
- 1 1/2 cups all-purpose flour
- 2 tablespoons granulated sugar
- 1 teaspoon salt
- 1/2 cup unsalted butter, chilled and cubed
- 4-6 tablespoons ice water
- Jam or jelly of your choice (optional)
- Egg wash (1 egg beaten with a splash of milk)
To make the pastry, whisk together flour, sugar and salt in a large bowl. Add the chilled, cubed butter to the mixture using your hands until it resembles coarse crumbs. Add the ice water one tablespoon at a time until the dough comes together.
Roll out the dough on a floured surface into a thin rectangle then cut it into even-sized rectangles. Place dollops of jam or jelly onto half of the rectangles then add another rectangle on top of each to form the pop tart sandwiches. Use a fork’s tines to press down on edges so they’re tightly sealed.
Preheat oven to 375F° (191 °C) and place pop tarts on a baking sheet lined with parchment paper. Brush them with egg wash, then bake until golden brown for about 25-30 minutes.
Adding sprinkles before baking would give these homemade treats an extra kick of sweetness. Enjoy!
These homemade pop tarts are great for breakfast or dessert. They can be stored in an air-tight container for up to two weeks or frozen individually as well.
Making Homemade Pop Tarts has been around since people started making their own pastries but have become more popular recently due to social media sharing photos and posts about them!
Step-by-step instructions for making homemade pop tarts using pie dough
Making homemade pop tarts using pie dough is a fun and easy activity with just a few steps. Follow these simple instructions for a delicious treat that you can customize to your liking.
- Roll out the pie dough – Start by rolling out your pie dough to a thickness of about 1/8 inch. Use a sharp knife or pizza cutter to cut the dough into rectangles approximately 3×5 inches in size.
- Add filling – Spoon your desired filling onto one half of each rectangle, leaving some room around the edges. Be careful not to add too much filling as it may leak out during baking. Gently lay the other half of the rectangle on top and use a fork to press around the edges, sealing them shut.
- Bake – Preheat your oven to 375°F and bake your pop tarts on a parchment-lined baking sheet for 25-30 minutes or until golden brown.
To add a unique touch, try icing or frosting your pop tarts once they have cooled down. Enjoy!
Did you know that there are hundreds of different types of pies around the world? According to BBC Good Food, some popular variations include chicken pot pie in America, shepherd’s pie in England, and Bobotie pie in South Africa.
Frequently Asked Questions
Inquiries Answered:
Looking for answers to your questions? Here are some explanations on commonly asked queries.
- Can you put poptarts in the oven?
Yes, you can put poptarts in the oven for a crispier texture. Follow the package instructions for heating temperature and duration. - What can and can’t go in the oven?
Avoid putting paper plates, plastic utensils, and glassware that isn’t labeled as oven-safe in the oven. Metal pans, ceramic dishes, and oven-safe glassware are safe choices. - How do you get rid of aluminum foil stuck on the bottom of the oven?
Allow the oven to cool down completely, then use a spatula or plastic scraper to remove as much foil as possible. Next, spray baking soda and water solution onto the affected area, let it sit for 30 minutes, and then scrape again. Wipe clean with a damp cloth.
Additionally, did you know that leaving an oven on when not at home can be a fire hazard? Always turn off the oven before leaving the house.
Fun Fact:
According to the CDC, the Sitka Fahrenheit Jacket is a high-tech garment that can withstand temperatures of up to -22°F, making it ideal for extreme cold weather.
Are pop tarts better toasted or microwaved?
Toasting or Microwaving Pop Tarts: What’s Better?
Pop tarts can be heated in a toaster or microwave. To determine the best method, consider the crispness and warmness you desire as well as the convenience of each method.
Here are some points to consider:
- Toast using a toaster oven for about 3 minutes for a crispy exterior and warm filling.
- Toaster heating elements should be soft so that they don’t damage the pastry.
- Microwave on high heat for 10-15 seconds for a warm but slightly less crispy pop tart
- If you’re in a hurry, microwaving is a quicker method, but it can result in soggy pastry if left for too long
- Be careful when removing your Pop Tart from the microwave, let it cool before taking a bite to prevent burning your mouth
It’s important to note that putting pop tarts in an oven is not recommended as it could burn or damage them.
If you prefer a sweeter and crunchier taste sensation, try applying some butter or peanut butter over the toasted surface. Enjoy with a cup of hot coffee or your favorite beverage!
Overall, either method can work well depending on individual preference and timing needs. It comes down to personal preference!
When reheating pop tarts, make sure to follow food safety guidelines by checking the expiry date on the packaging. If it has expired, discard. As always, refer to proper cooking temperatures & times for safe consumption.
Happy Snacking!
How can you make pop tarts without a toaster?
Baking pop tarts is possible even without a toaster. Don’t worry about using the oven instead as it can give you the same results. Follow the steps below to create your own homemade pop tarts through baking.
- Preheat your oven to around 375°F.
- Take your favorite pop tart flavor and slice them in half or leave them whole, whichever way you prefer.
- Prepare your honey and brush it onto the top of each slice of pop tart.
- Place the slices onto parchment paper on top of a baking sheet.
- Bake for approximately 10 minutes or until they turn golden brown.
- Leave them to cool for a minute before enjoying!
It’s important to note that you can always adjust the oven temperature based on how crunchy or soft you prefer your pop tarts to be. Lastly, using honey instead of frosting gives an added sweetness with a healthier twist.
Pro Tip: You can make different glazes by mixing honey with other ingredients such as cinnamon or lemon juice for more variety in taste!
Conclusion
The Process of Baking Pop Tarts in An Oven
Baking pop tarts in an oven is a simple process that requires placing the pop tarts on a baking tray and putting them in the oven. Follow the instructions on the packaging to determine the correct temperature and baking time. Pay attention to the oven temperature to prevent burning or undercooking.
It is important not to use paper plates in the oven as they can catch fire, and avoid placing glass dishes in the oven if they are cold, as they can shatter due to thermal shock. Ensure the oven element is not sparking or malfunctioning to prevent accidents.
Once the pop tarts are done, use oven mitts to take them out of the oven and onto a cooling rack. Be careful when handling hot trays or dishes to prevent burns. Use caution when trying to remove aluminum foil from the bottom of the oven as it can be hot and sharp.
In one instance, a clothing tag got stuck in an oven and caused a fire when the oven was turned on. It is important to check for any foreign objects inside the oven before using it.
Overall, baking pop tarts in an oven is a quick and easy process, but one must take precautions and ensure their oven is functioning correctly to prevent accidents.
Five Facts About Pop Tarts in Oven:
- ✅ Pop tarts can be cooked in a conventional oven at 350°F for 4-5 minutes. (Source: Pop Tarts official website)
- ✅ Pop tarts should be placed on a baking sheet before being placed in the oven. (Source: Pop Sugar)
- ✅ Pop tarts can also be cooked in a toaster oven or microwave for a quicker cooking time. (Source: Auntie Anne’s Kitchen)
- ✅ Overcooked Pop tarts can become tough and chewy. (Source: The Kitchn)
- ✅ Popular flavors of Pop tarts include strawberry, brown sugar cinnamon, and s’mores. (Source: Kellogg’s)
FAQs about Pop Tarts In Oven
Can you put pop tarts in the oven?
Yes, you can put pop tarts in the oven. To do so, preheat your oven to 350 degrees Fahrenheit and place the pop tarts on a baking sheet lined with parchment paper. Bake for 10 to 12 minutes or until golden brown.
Can you put paper plates in the oven?
No, you should not put paper plates in the oven as they can catch fire. Stick to using oven-safe dishes made of glass, ceramic or metal.
How to take pizza out of oven?
To take pizza out of the oven, use oven mitts to protect your hands and grasp the pizza pan from the sides. Carefully slide the pizza onto a cutting board or serving platter.
How to get aluminum foil off the bottom of the oven?
To get aluminum foil off the bottom of an oven, let the oven cool completely. Then, use a plastic scraper to gently remove the foil. Be careful not to scratch the oven surface.
How to calibrate Frigidaire oven?
To calibrate a Frigidaire oven, press the “bake” button and select a temperature. Wait for the oven to preheat, then use an oven thermometer to check the actual temperature. If the temperature is off, use the oven’s calibration feature to adjust it.
How to turn off oven cooling fan?
To turn off an oven cooling fan, locate the oven’s circuit breaker and switch off the power. Wait for a few minutes for the fan to cool off before attempting to touch it.
